Honda City i-VTEC VMT (2009): Ownership Review


Thread Starter #1
Joined
Oct 12, 2012
Messages
1,166
Likes
1,330
Location
Hubli
Hello guys, How are you?

It has been more than a year since I posted on this thread and almost lost touch with the forum members. Got busy with car port construction and little renovation of my house. Whenever I had sometime, my mood wouldn't allow me to write and instead takes me to PC gaming.

BUT I couldn't hold my breath anymore so now I'm gonna wake this thread and post whatever I have done to my ANHC 09' so far..... [:D]
 
Thread Starter #2
Joined
Oct 12, 2012
Messages
1,166
Likes
1,330
Location
Hubli
Taillights Replacement (April 2021):

Original taillights had micro cracks and broken seal so they were getting wet inside and causing mold. I tried to clean it several times and applied sealant but it didn't last long and I got fedup. OEM taillights made by Stanley Electric Japan cost 3.5k per piece but the same product from Lumax costs 2.5per piece or 4.8k if you buy in pair. Two years ago Lumax has made tie-up with Stanley Electric Japan and I believe Lumax is OEM suppliers for Honda cars now.

I bought pair of Lumax taillights from Autoretails online store but with some hesitation because it was my first order and that time Boodmo didn't them (Now they do but price is higher). Fortunately seller shipped the order in time and was delivered intact. OEM lights and Lumax lights were almost similar; I didn't see any difference in design and quality. You can check comparison pictures below.

Link to product: Here

Pictures:
Lumax_Taillights_001.jpg Lumax_Taillights_002.jpg Lumax_Taillights_003.jpg OEM_Lumax_Taillights_001.jpg OEM_Lumax_Taillights_002.jpg OEM_Lumax_Taillights_003.jpg OEM_Lumax_Taillights_004.jpg
 
Thread Starter #3
Joined
Oct 12, 2012
Messages
1,166
Likes
1,330
Location
Hubli
Engine Oil Change (October 2022):

I get new engine oil for my car every year even though the running is very low. Since from 5 years, I have never visited Honda ASC and I'm using Motul Engine Oil only. For the first two years I got the oil changed from nearby FNG because I couldn't remove the drain bolt. Later I was able to get it removed using Groz Telescopic Wrench and since then I'm doing engine oil change myself. This year it was even easier because my new car port is open on the backside as well and there are two steps so I can bring the car to the edge and there is ample space to access the drain bolt and oil filter.

I was using 5w40 for 3 years and then started using 0w40. There wasn't any major difference in performance but price was very similar (~2.5k) so I got the thinner oil to lubricate engine faster on cold start. This time Amazon sent me slightly leaked can but gave full refund when I informed them and let me keep the oil so it was a free oil change!

Link to Engine Oil: Motul 8100 X-Cess 5w40, Motul 8100 X-Max 0w40
Link to Oil Filter: OEM MAHLE TENNEX

Pictures:
Honda-City.jpg
 
Last edited by a moderator:
Thread Starter #4
Joined
Oct 12, 2012
Messages
1,166
Likes
1,330
Location
Hubli
7 Fin Rear Bumper Diffuser (November 2022):

I wanted to put this plastic diffuser to improve the rear aesthetics of my car and horsepower (Just kidding!) but could only buy it recently from Autotrends online store through my friend (Most of the time it will be out of stock). It cost me Rs. 790/- and the quality is pretty good though the installation was tricky for my car. There is a tow hook which was obstructing so I had to heat the middle fin using hot air gun and press it. Initially I though cut out was needed but not really. As you can see in the below picture(s), the bumper is just two inches on the bottom and then there is about 5-6 inches gap till stepney case so after installing the diffuser, the gap has been almost filled. Pardon for not taking pictures before installing the diffuser.

Link to product: Here

Pictures:
7-Fin_Diffuser_001.jpg 7-Fin_Diffuser_002.jpg 7-Fin_Diffuser_003.jpg 7-Fin_Diffuser_004.jpg 7-Fin_Diffuser_005.jpg 7-Fin_Diffuser_006.jpg 7-Fin_Diffuser_007.jpg 7-Fin_Diffuser_008.jpg 7-Fin_Diffuser_009.jpg
 
Thread Starter #5
Joined
Oct 12, 2012
Messages
1,166
Likes
1,330
Location
Hubli
Exide Mileage ML38B20L 35AH Battery (December 2022):

First battery (Amaron Black) which came with car lasted 5 and half years whereas second battery (Exide Mileage) broke the record with 7 and half years! Last week I visited ASC for suspension checking and there it was having trouble starting so SA asked me to get it replaced from us but their quote was higher then battery dealers hence I refused to buy from them. I took the delivery in the evening and went straight to Exide dealer to get a new battery. Cost me 4.5k without giving old battery (I needed it for DIY purpose). I hope the third battery lasts 10 years! [:D]

Link to product: Here
Exide_35Ah_01c.jpg Exide_35Ah_04.jpg Exide_35Ah_02c.jpg Exide_35Ah_03c.jpg Exide_35Ah_07.jpg
 
Thread Starter #6
Joined
Oct 12, 2012
Messages
1,166
Likes
1,330
Location
Hubli
OSRAM LEDriving H4 Bulbs (September 2022):

I was using Philips Crystal Vision halogen bulbs for past 7 years and they were decent but later they became dim. My car headlights are clean as I have restored them awhile ago (Check here) so bulbs were definitely faded overtime and cannot expect much from filament bulbs. Anyway, I wanted to try LED bulbs this time and done some research. Cheap generic ones have scattered throw and no cut off. Branded Chinese bulbs like Crystal Eye, Y8 Mini Projectors are super bright and more suitable for highway driving. Then I found OSRAM led bulbs which had pretty good reviews and price around 3-3.5k on Amazon India. I stored it on wishlist to buy during festival sales but guess what? few days before the sale, there was a price drop to 1.8k! It was a steal so I grabbed it right away. As per keepa, such price drop hasn't happened again so far.

I got the bulbs next day with proper packing and sealed box. They were direct replacement so installation was pretty easy but method is little different though. Remove old bulbs, fit the H4 flange (provided with the LED bulbs) to the headlight socket, put back the rubber dust cap and then insert the LED bulb (vertically) into the flange. Finally connect H4 plugs and tie the LED driver anywhere but away from heat of the engine.

Being a Osram brand, build quality and finishing is excellent. Bulb has aluminum heatsink with little fan to keep it cool and LED driver case is made of metal. Brightness isn't super bright like projectors but much better then halogen bulbs with very similar cut off and doesn't blind the oncoming traffic. I have been using them for three months and didn't had issues driving at night (within city limits). For highway driving though I suggest Crystal Eye, Monster Vision or Y8 Mini Projectors.

Link to the product: Here (Also available for different sockets)

Pictures:
Osram_H4_LED_Bulb_001.jpg Osram_H4_LED_Bulb_002.jpg Osram_H4_LED_Bulb_003.jpg Osram_H4_LED_Bulb_004.jpg Osram_H4_LED_Bulb_005.jpg Osram_H4_LED_Bulb_006.jpg Osram_H4_LED_Bulb_007.jpg Osram_H4_LED_Bulb_008.jpg Osram_H4_LED_Bulb_009.jpg Osram_H4_LED_Bulb_010.jpg Osram_H4_LED_Bulb_011.jpg Osram_H4_LED_Bulb_012.jpg Osram_H4_LED_Bulb_High-Beam.jpg Osram_H4_LED_Bulb_Low-Beam.jpg
 
Thread Starter #7
Joined
Oct 12, 2012
Messages
1,166
Likes
1,330
Location
Hubli
Sulfar T10 LED Bulbs (September 2022):

After upgrading the headlight bulbs to OSRAM Led bulbs; the parking bulbs looked blueish because they were halogen T10 bulbs provided with Philips Crystal Vision H4 and I replaced them to Sulfar T10 LEDs. Color temp of these LED bulbs as per specs is 6000k but they look warm white and perfectly matched the color of OSRAM H4 Led bulbs.

Link to the product: Here

Pictures:
Sulfar_T10_LED Bulbs_01.jpg Sulfar_T10_LED Bulbs.jpg Philips_CV_T10_Bulbs.jpg
 
Last edited:
Thread Starter #8
Joined
Oct 12, 2012
Messages
1,166
Likes
1,330
Location
Hubli
Liqui Moly MAF Sensor Cleaner (September 2022):

Since I have stopped going to ASC and doing minor servicing myself; Cleaning the MAF sensor is as important as replacing air filter (I use K&N filter though :p ) to get optimal engine performance but cleaning should be done carefully because MAF sensor is a expensive part and has sensitive components. For those who want to know more about the sensor, please check here and this ChrisFix video on how to clean it. Normally ASC or FNG guys use IPA to clean the sensor but if the solution isn't pure, it leaves the residue on the sensor or if it is harsh then it can damage the sensor. Hence I didn't want to take risk and instead bought a specially made cleaner for MAF sensor by Liqui Moly. The spray can costs 1k which is little expensive but can be used 2-3 times to clean the sensor and I believe it is worth.

I have collected sensor data from OBD before and after cleaning the MAF sensor and you can see slight difference in MAF Air Flow Rate as well as RPM, both of which have reduced. I think this change is indeed related MAF sensor because ChrisFix also found similar results from OBD. However, I didn't notice any major difference in engine performance while driving around.

Link to product: Here

OBD Snapshots: Before Cleaning
Before_01.jpg Before_02.jpg

OBD Snapshots: After Cleaning
After_01.jpg After_02.jpg

Pictures: Liqui Moly MAF Cleaner
Liqui-Moly_MAF_Cleaner_000.jpg
Liqui-Moly_MAF_Cleaner_002.jpg
Liqui-Moly_MAF_Cleaner_003.jpg

Pictures: Honda City 3rd Gen OEM MAF Sensor
Honda_MAF_Sensor_001.jpg Honda_MAF_Sensor_002.jpg Honda_MAF_Sensor_003.jpg
 
Last edited:

bhvm

Honoured Member
Joined
Oct 15, 2011
Messages
5,289
Likes
4,818
Location
Some Village
I stored it on wishlist to buy during festival sales but guess what? few days before the sale, there was a price drop to 1.8k!
I was going to buy them. But the price immediately shot up to 3.5~4k and has been hovering around since.
They're still in my Wishlist. Will buy when below 3k.
put back the rubber dust cap and then insert the LED bulb (vertically) into the flange.
I am doubtful about long term alignment of these bulbs. It appears that they're just friction held in by 2 red rubber O rings. Older design of such bulbs has a twist fit lock. I wonder if these will come loose or shift their alignment on bad roads.
very similar cut off and doesn't blind the oncoming traffic.
May I please have a proper High-Low beam shot on plain white wall? Esp the cutoffs.
I replaced them to Sulfar T10 LEDs.
Epoxy encased LEDs are known to have poor life as the clear plastic traps heat inside. I would always opt for LEDs mounted on some form of heatsink.
Cleaning the MAF sensor is as important as replacing air filter
I have brought one of the cheaper yet reputed electrical contact cleaner. Will post the results upon trying on my Blue elephant thread.
 
Thread Starter #10
Joined
Oct 12, 2012
Messages
1,166
Likes
1,330
Location
Hubli
I was going to buy them. But the price immediately shot up to 3.5~4k and has been hovering around since.
They're still in my Wishlist. Will buy when below 3k.
Yes, you are right. I also want to buy same bulbs with H11 socket for fog lights and waiting for price drop.

I am doubtful about long term alignment of these bulbs. It appears that they're just friction held in by 2 red rubber O rings. Older design of such bulbs has a twist fit lock. I wonder if these will come loose or shift their alignment on bad roads.
Yes, a locking mechanism would have been better. So far the bulbs are held securely and they have provided extra O rings if it becomes loose in future. It also depends on dust cap thickness and space on the socket cutout. My friend's Swift has thick dust cap and this bulb doesn't go all the way unless we cut the dust cap.

IMay I please have a proper High-Low beam shot on plain white wall? Esp the cutoffs.
Actually I wanted it for alignment but couldn't find and my new car port is open on both ends. May be I have to tie a white backdrop lol. Anyway, as soon as I figure it out will share it to you.

Epoxy encased LEDs are known to have poor life as the clear plastic traps heat inside. I would always opt for LEDs mounted on some form of heatsink.
Yep, I'm sure the epoxy will turn yellow in year due heat and burn one day. Unfortunately we still have no access to Aliexpress to buy better bulbs and most of the LEDs sold here are bluish color.

I have brought one of the cheaper yet reputed electrical contact cleaner. Will post the results upon trying on my Blue elephant thread.
Sure, I will look forward to it. Thanks...
 
Thread Starter #11
Joined
Oct 12, 2012
Messages
1,166
Likes
1,330
Location
Hubli
DIY Mobile Holder (November 2021):

The music system of Honda City 3rd Gen has flip down panel to access USB port, AUX and remote storage. This place is perfect fit for my ASUS Zenfone 6 and similar size smartphones but it requires a hook to hold the phone. So for that I have used a plastic clip from salvage parts (printer's) and did a little cutting/filing to make it suitable. Below you can find the pictures of the plastic clip as well as diagram. Although the music system operates while the panel is flipped down but we cannot see the LCD display so sometimes I use AUX to play online music from phone and vents will keep it cool.

Pictures:
DIY_Mobile_Holder_02.jpg DIY_Mobile_Holder_Diagram.jpg DIY_Mobile_Holder_03.jpg DIY_Mobile_Holder_04.jpg DIY_Mobile_Holder_05.jpg DIY_Mobile_Holder_07.jpg
DIY_Mobile_Holder_06.jpg
 
Thread Starter #12
Joined
Oct 12, 2012
Messages
1,166
Likes
1,330
Location
Hubli
Door Weather Strips Replacement (August 2022):

All the rubber weather strips on the door and opening were worn so it was time to replace them but they don't come cheap though. Tube like strip for door edge cost Rs. 500-600 per piece and ~1k for door opening because it made of rubber with steel armor. Total cost for 10 rubber strips was 7.3k and I bought them from Boodmo.

Replacing rubber strips from door opening was quite easy; simply pull out old strip, align new one correctly and press it all-round. However, the tube like strip on door is little tricky and more effort The strip is fixed using plastic plugs all-round the door so we have to pull it out using pry tool or nose plier and also remove check arm bolt to take out the strip. Once it is out, we can fix new strip using provided plastic plugs (on top there is a groove to hold the rubber) and finally reinstall the check arm bolt (Apply medium strength threadlocker). To replace all the rubber strips I have taken two days time.

Link to product: Here

Pictures:
ANHC_Rubber_Strips_01.jpg ANHC_Rubber_Strips_02.jpg ANHC_Old Rubber_Strips_01.jpg ANHC_Old Rubber_Strips_02.jpg ANHC_Check_Arm.jpg Tools_For_Rubber_Strips_Replacement.jpg
 
Last edited:
Thread Starter #13
Joined
Oct 12, 2012
Messages
1,166
Likes
1,330
Location
Hubli
Partial Suspension Overhaul (January 2023):

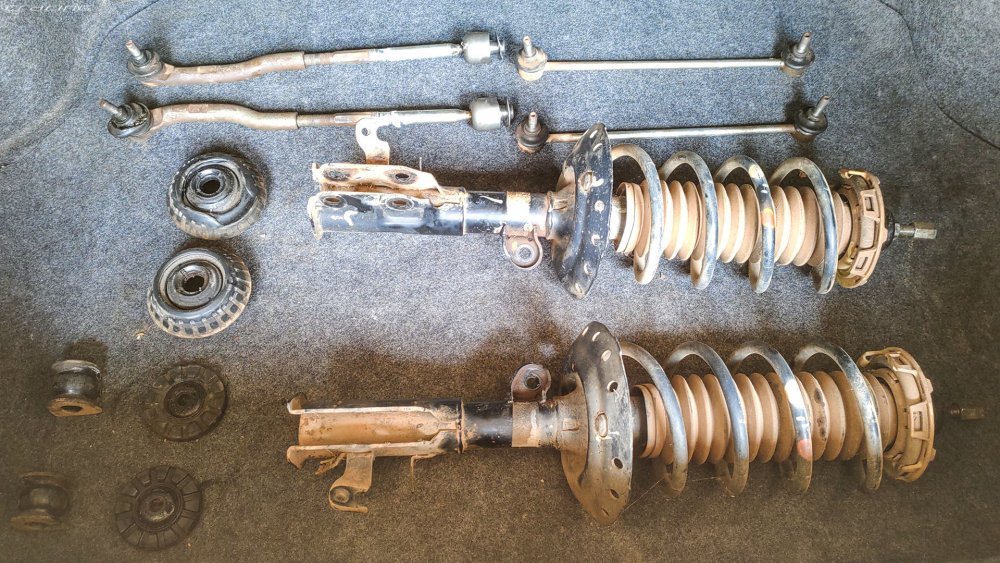
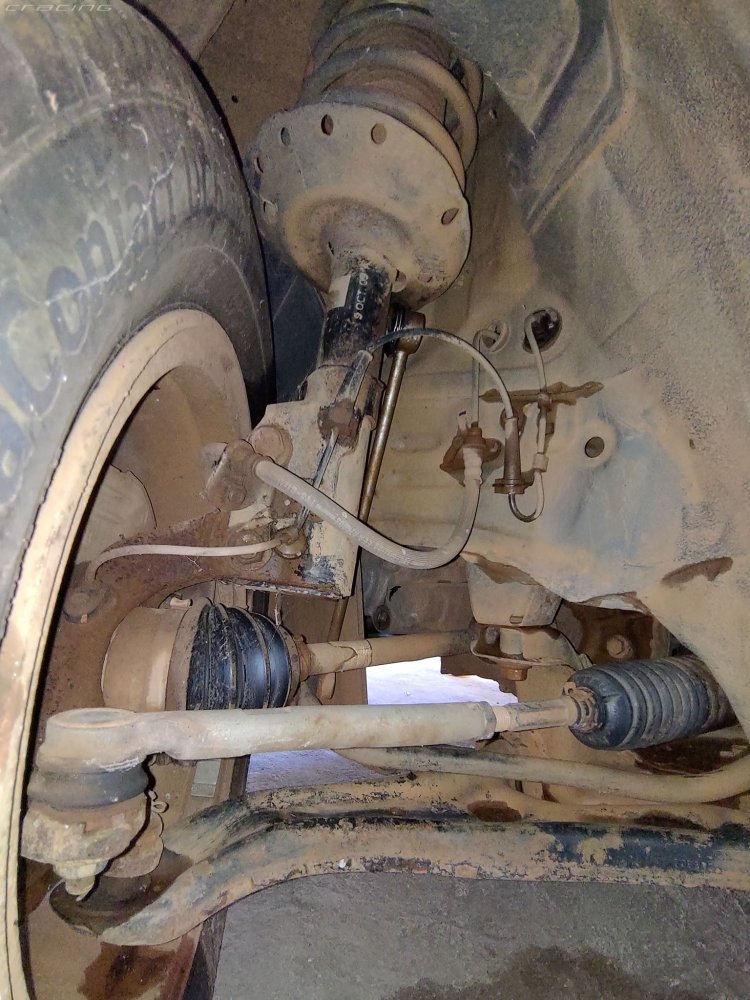
Long due work is finally done, that is replacement of front worn suspension parts. The car had following issues from quite a while and of late they had become unbearable: 1. Squeaky noise from driver side strut mount when the steering is turned to full right. 2. Sagged and stiff suspensions. 3. Knocking noise from the front while going on potholes & speed bumps. 4. Rubber boot of stabilizer link and tie rods were torn and ball pin had partially play.

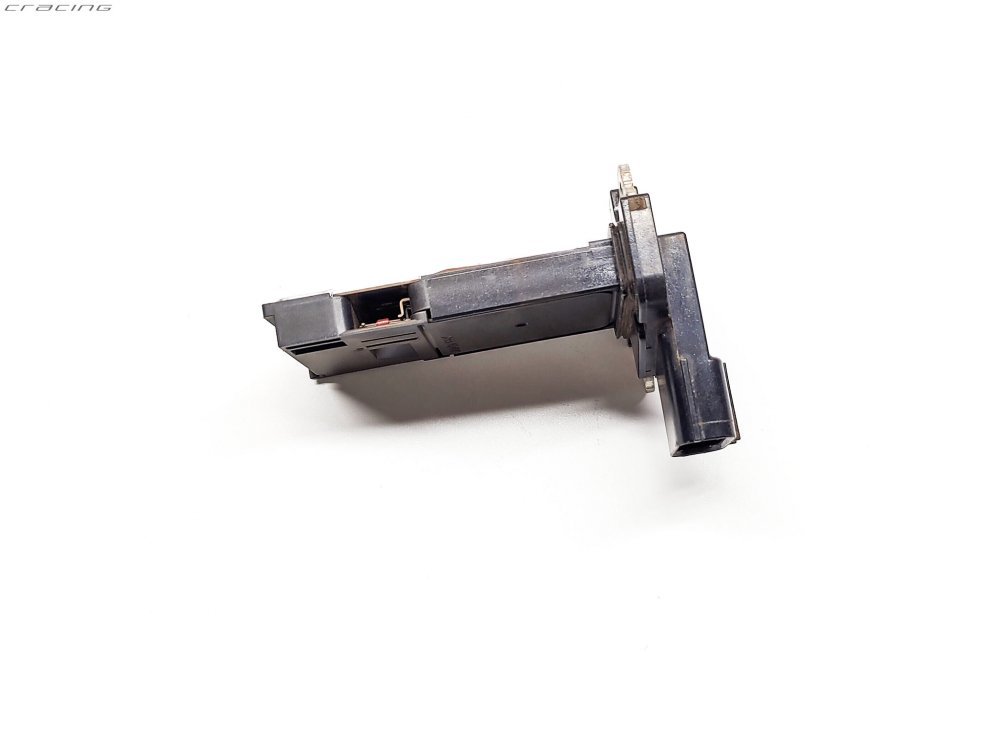
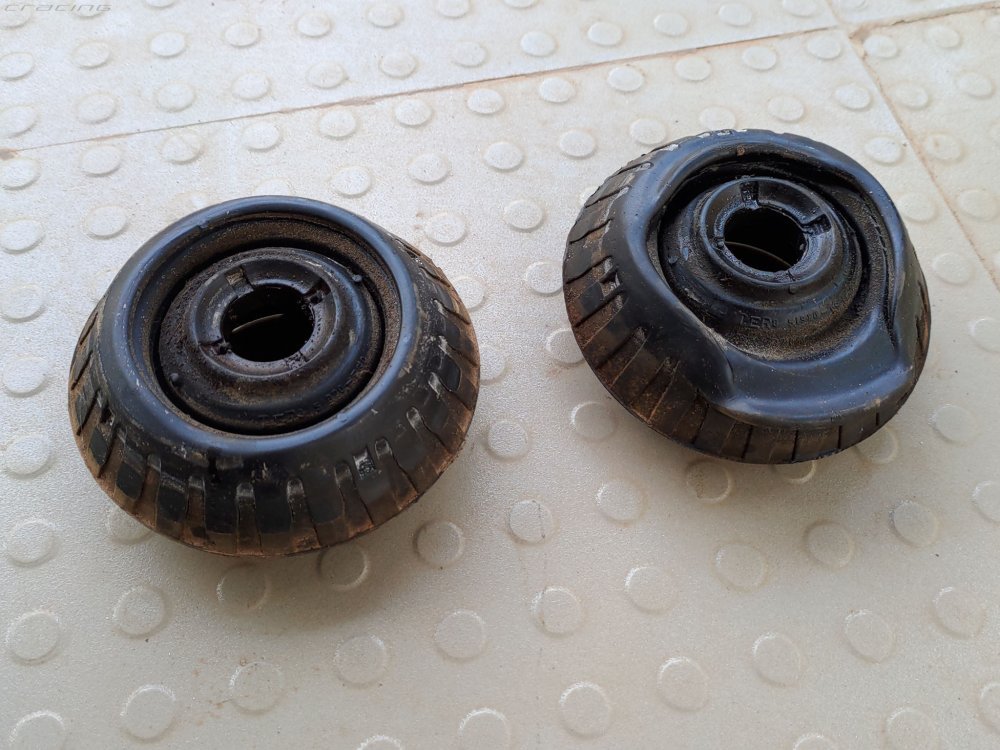
Last month I took my car to Honda ASC for selective servicing (Transmission oil, brake fluid and coolant replacement) and asked them to check suspension condition as well. They did a short test drive on a good but busy highway so above issues were not much noticeable. I left the car at ASC for servicing and returned back in the evening. They checked the suspension parts under lift and noticed some play in ball joints as well as in steering rack. SA said it will be fine for few thousand kilometers but still I insisted him on getting partial suspension overhaul. However, major parts will not be in stock with service center and will be ordered upon request with 50% advance payment. We selected following parts and the total estimation was 38k excluding labor. Front strut assembly and strut mounts, rear shocks, tie rods (inner and outer), stabilizer links, stabilizer bush and several nuts for these parts. Made 15k advance payment for new suspension parts and 3k for servicing as mentioned above (Invoice attached below).

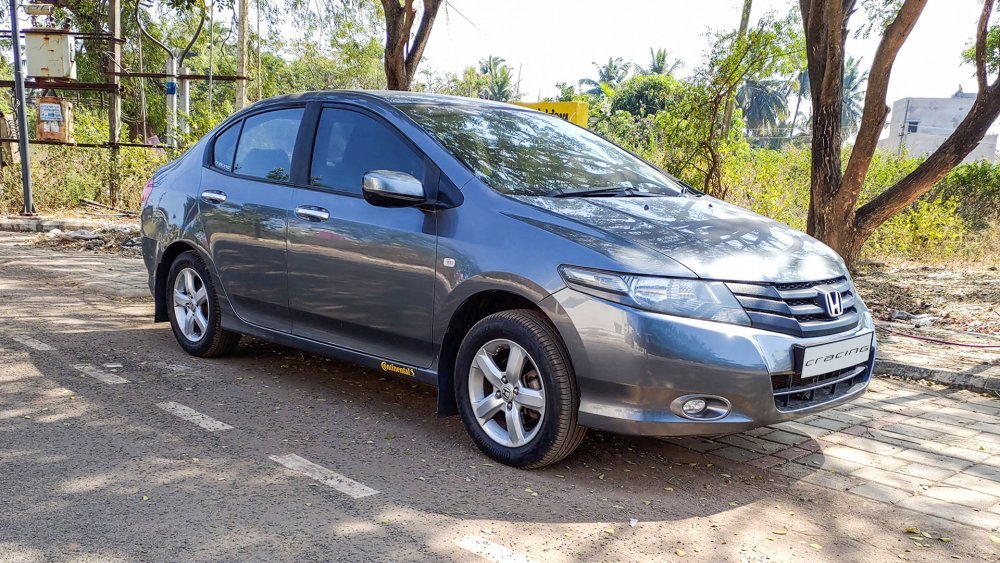
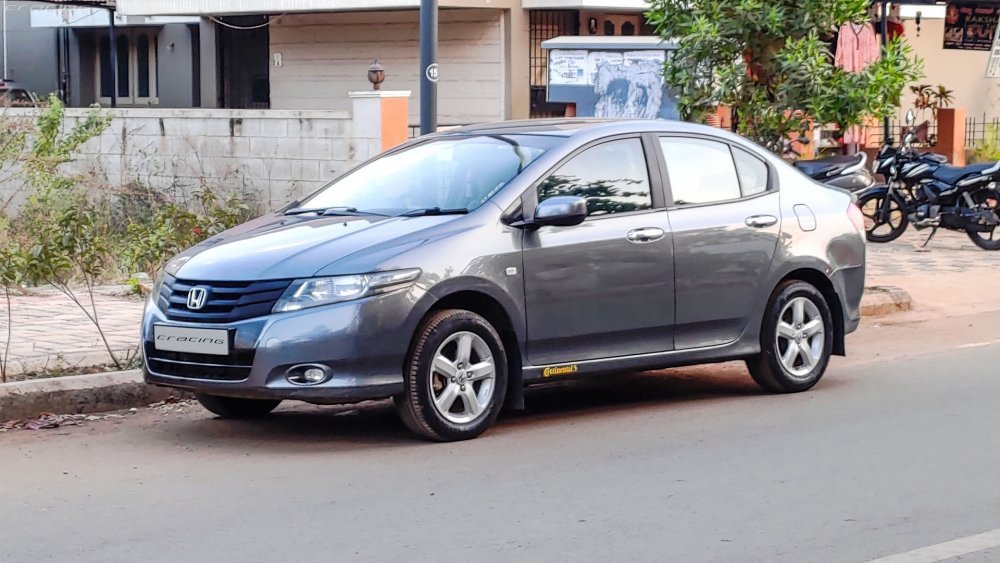
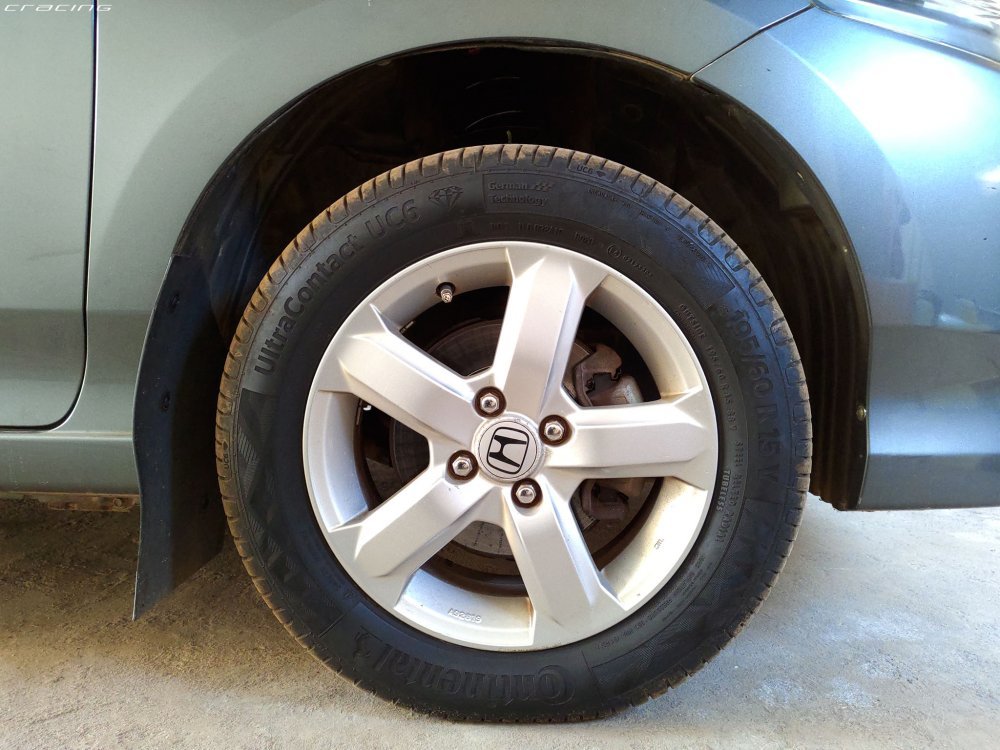
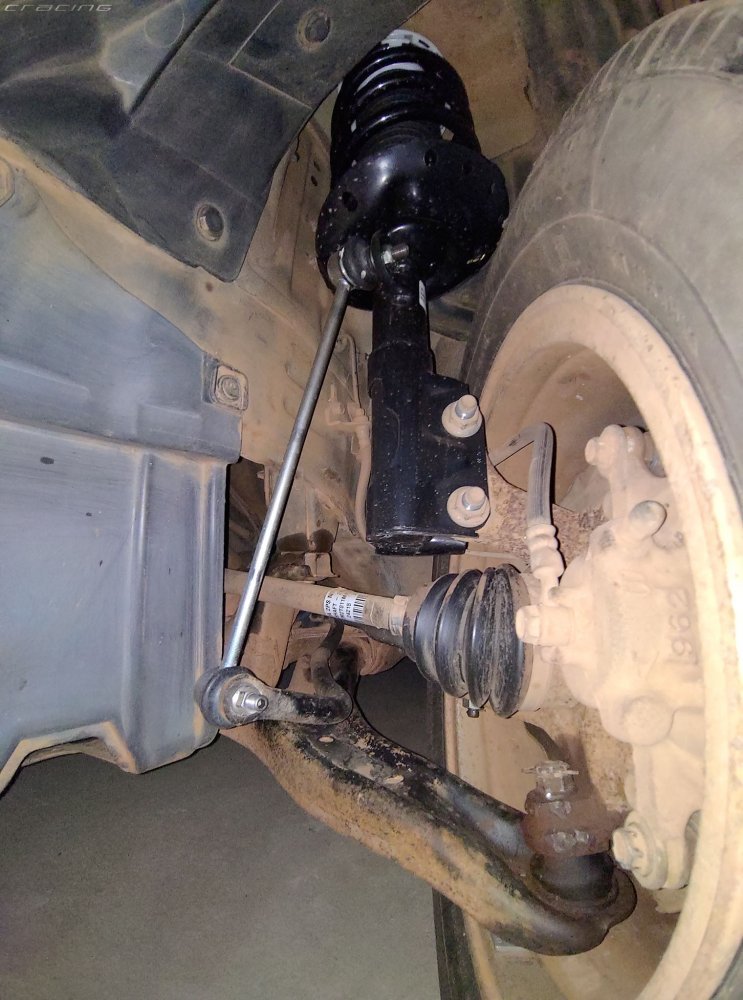
Last week I got call from SA and he said all parts have arrived except rear shocks (approx 6k less from above estimation) and asked me to bring the car for installation. Dropped my car at ASC and returned next day to pickup. It was ready by afternoon itself and total payable was 35.7k which includes 4.5k for labor (Invoice attached below). They did wheel alignment and washing for free of charge. On first glance I was shocked at how much the front end was lifted (Almost 2 cm higher then rear) and all these years I was struggling with a sagged car. About 90 percent noise is gone and remaining is from rear suspensions, though it is very minor and can be heard only when windows are opened. The car rolls smoothly on uneven roads with 2nd or even 3rd gear; before I used to slow down and down shift on potholes & speed bumps.

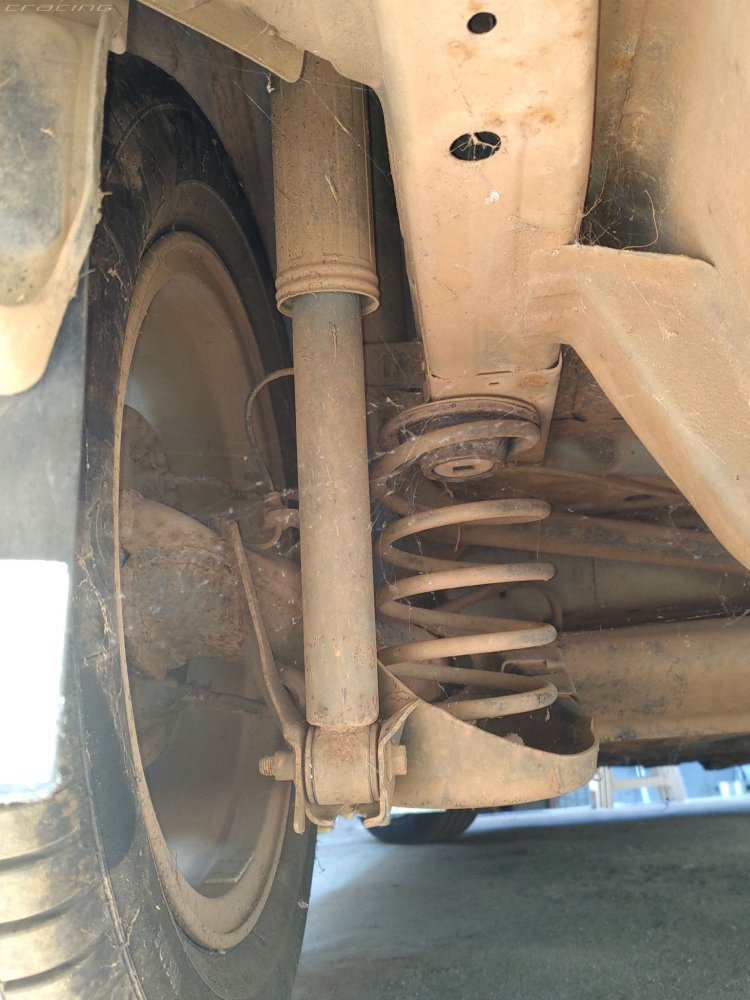
Now what I disliked is sagged rear suspensions which has somewhat spoiled the aesthetics of the car. Upon checking invoice later, I noticed that they have installed strut assembly of facelift model (51610-TM2-K54) and I thought it lifted the front end because facelift model has higher GC but later when I checked several videos on youtube (i.e here is one), even correct strut assembly (51610-TM2-K01) has lifted the front end of the car just like mine. SA said they have used latest or upgraded struts and it doesn't harm anything and will look normal when rear suspensions are also replaced. Still I have following concerns, please let me know if you guys know about it: Is it okay to use strut assembly from facelift model? does it get settled after sometime? Does it cause any problems with other parts?

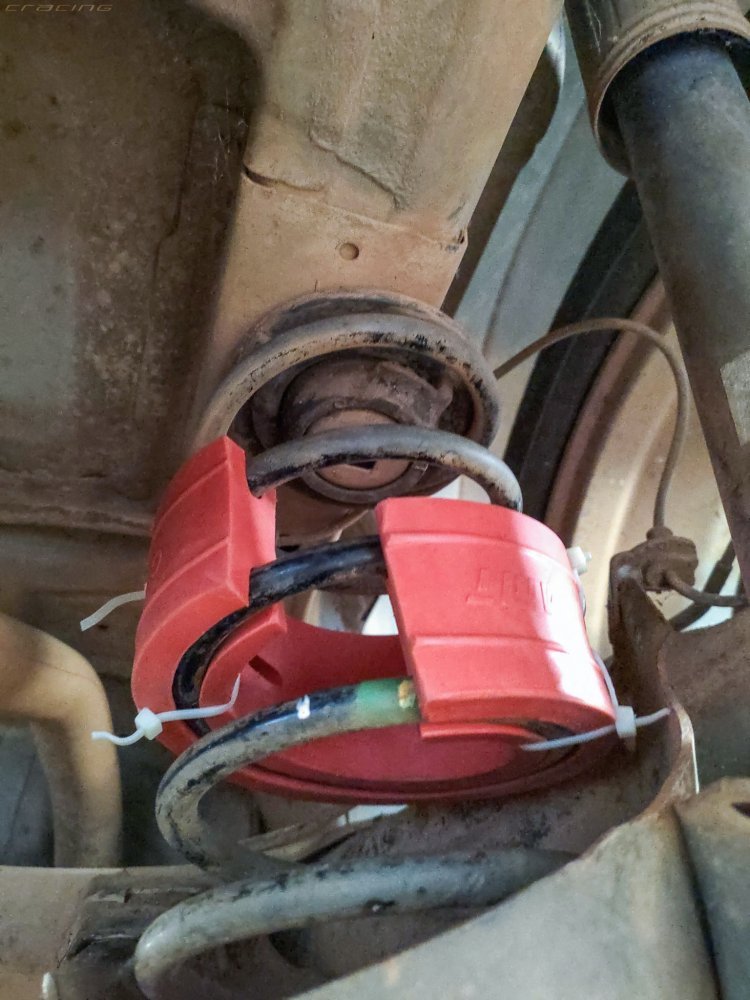
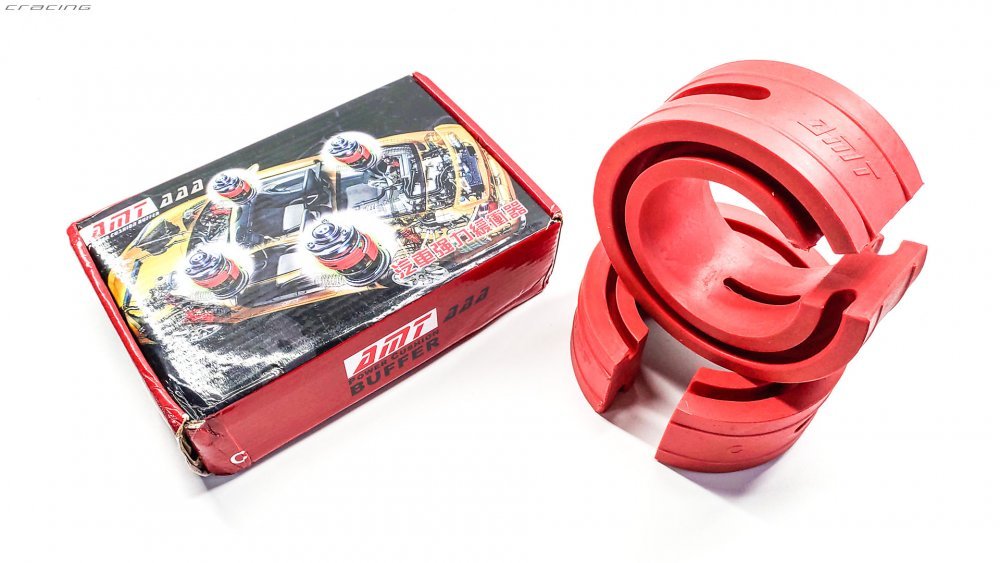
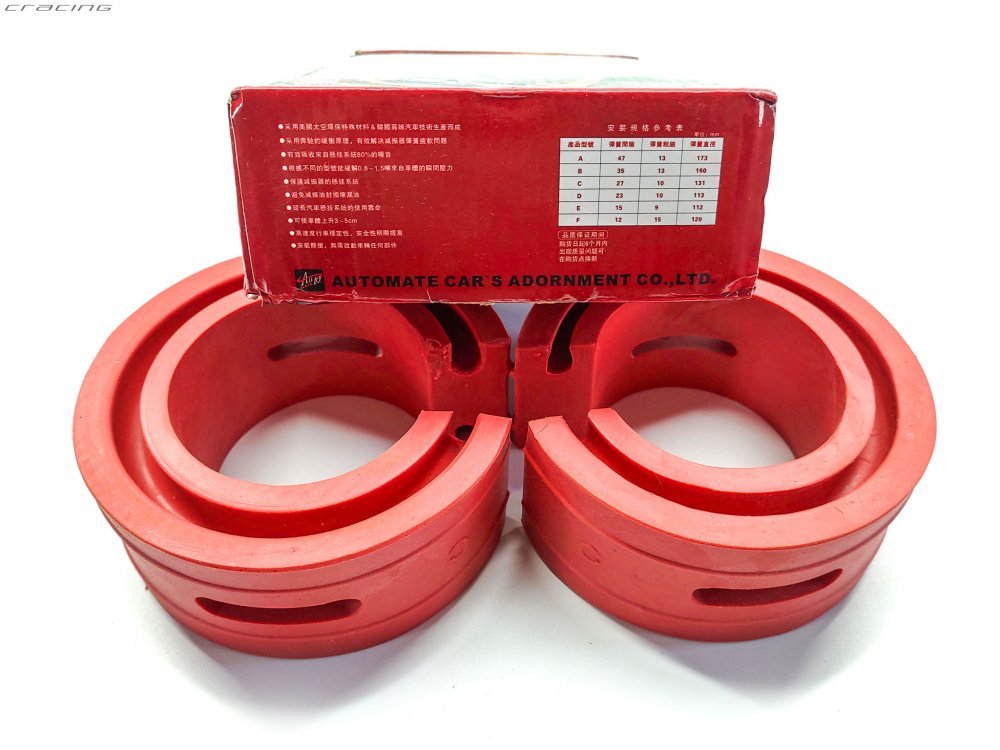
My friend suggested me to get rear coil spring buffers until I replace rear suspensions. It will raise the height and normalize the look of the car but may cause stiffness so it is a little trade off. Another option was to replace only the coil springs for now but another friend said old shocks will over compress the new springs and again cause stiffness. So I felt going with buffers was a better option and I opted for AMT brand ones on Autotrends for Rs. 900/- instead of 2.2k Rogerob on Amazon. Buffers are still on way so I will make a post on them later.

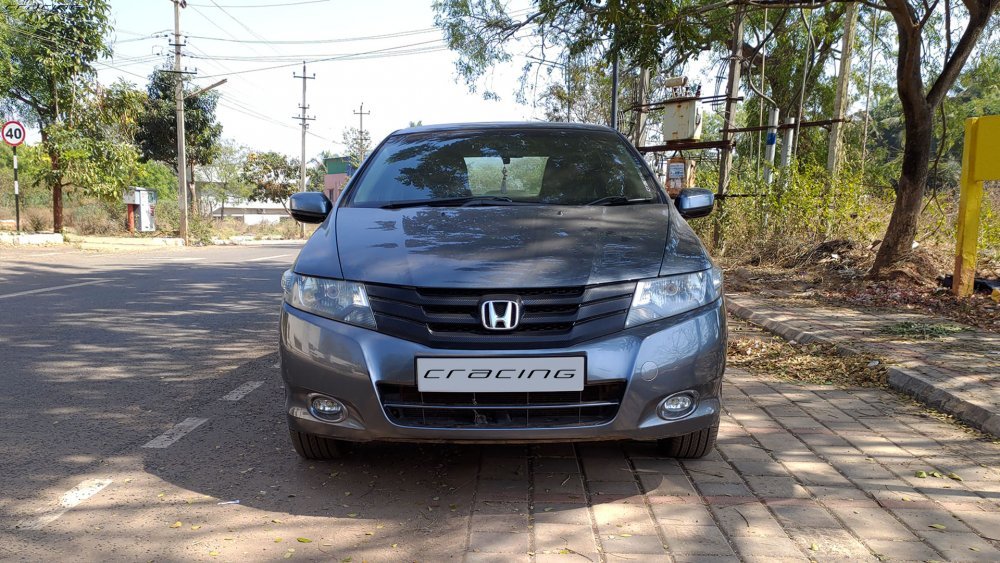
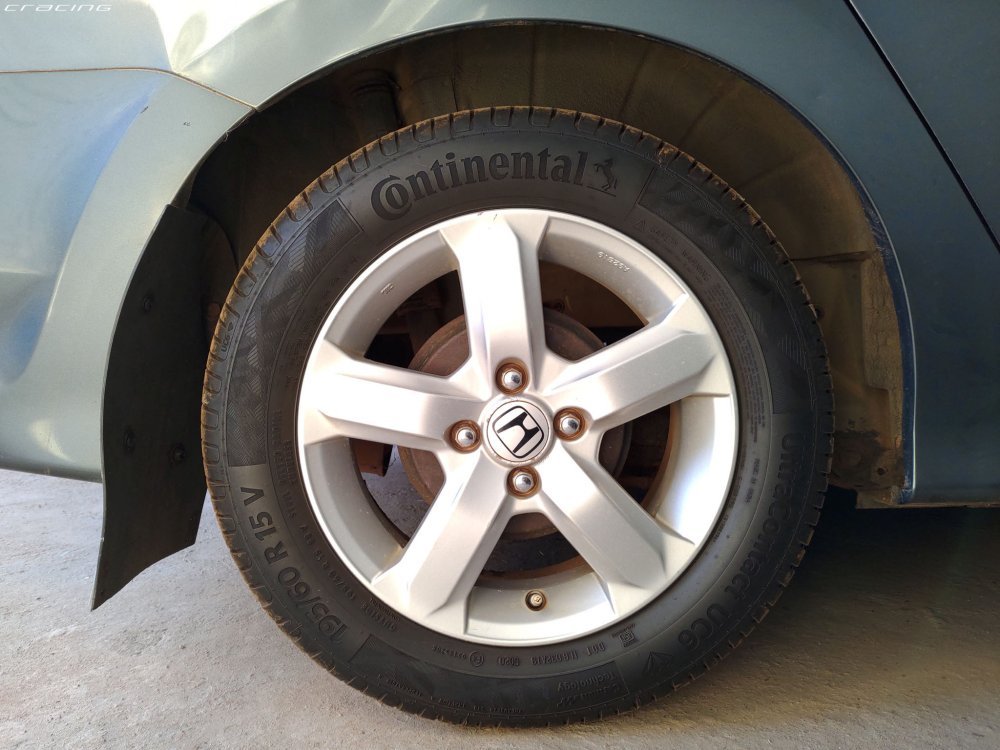
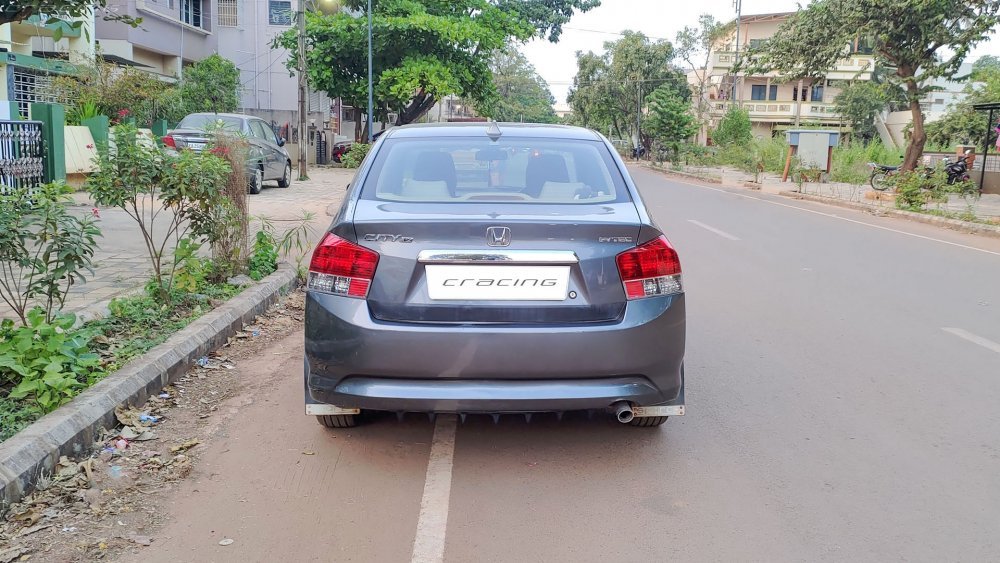
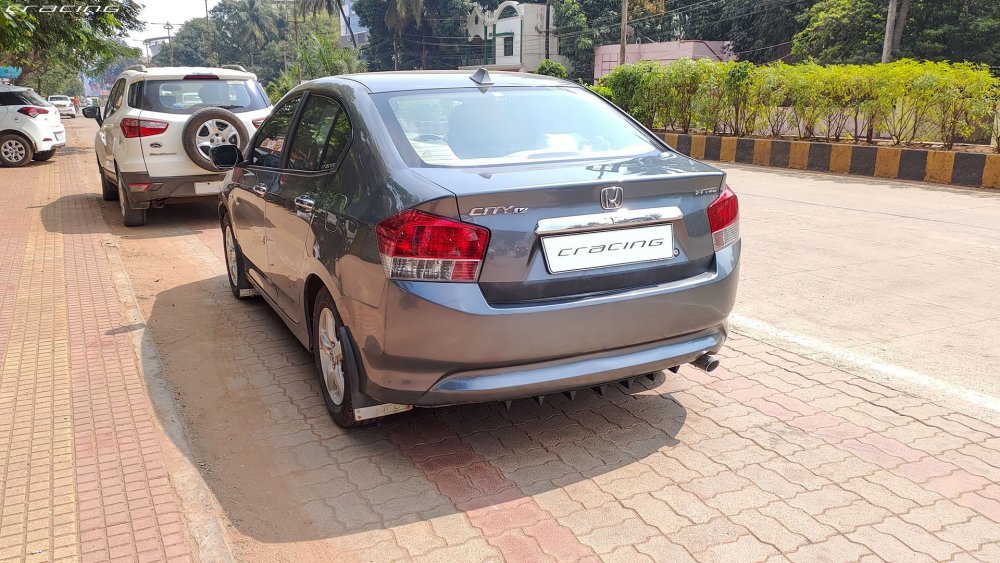
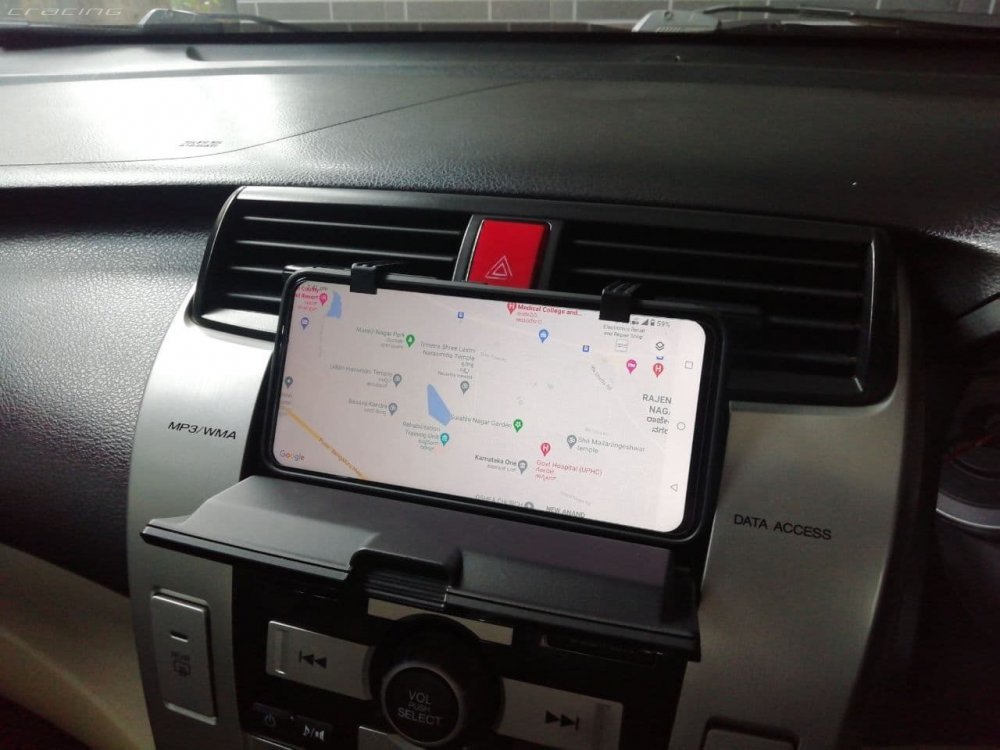
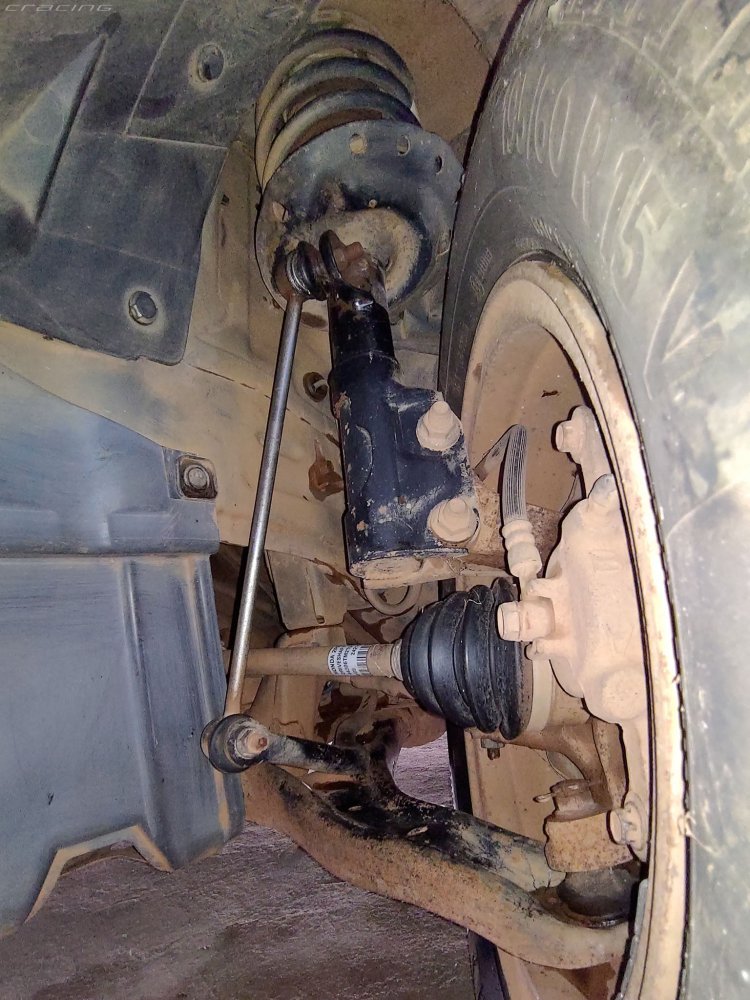
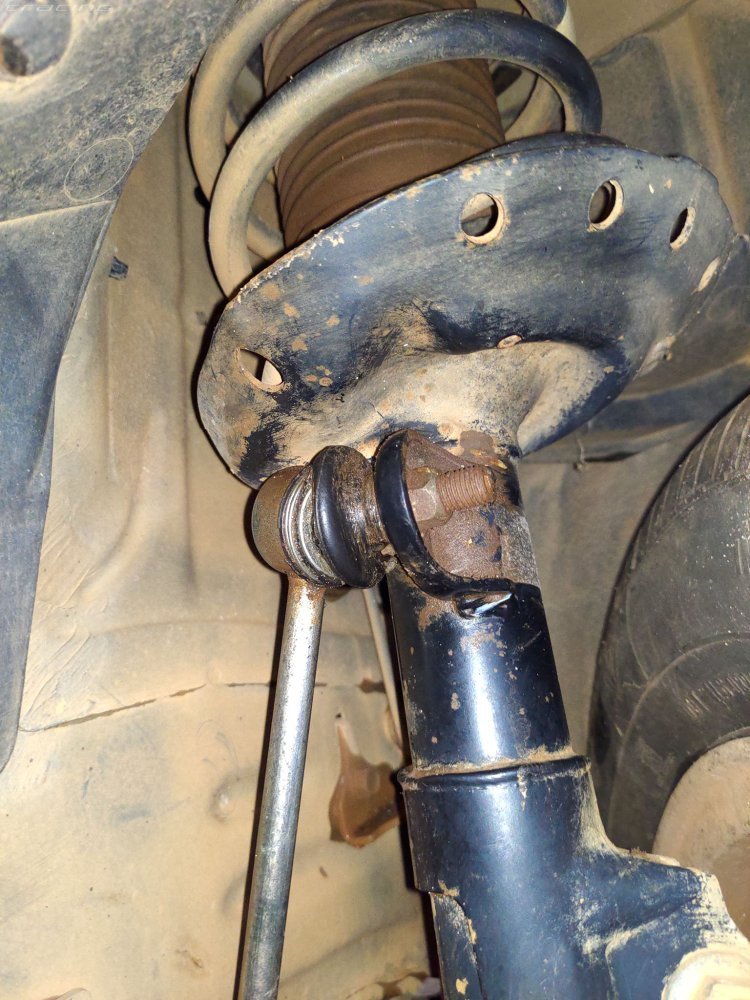
Here is how my car looks after replacing front suspension parts:
CR_ANHC_New_Front_Suspensions_01.jpg
CR_ANHC_New_Front_Suspensions_02.jpg
CR_ANHC_New_Front_Suspensions_03.jpg

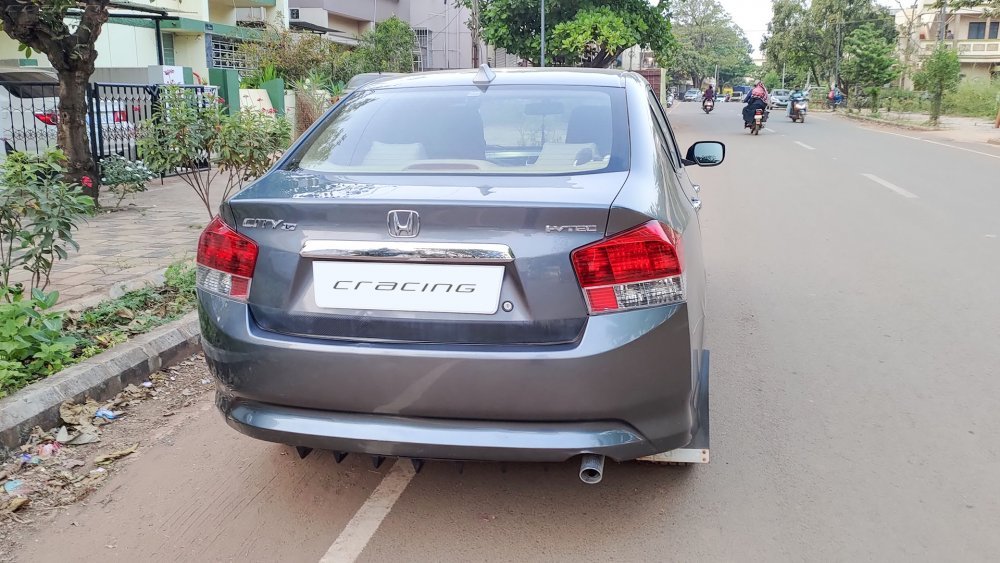
Gap above front and rear wheels (2-3 cm difference):
FR_Wheel.jpg
RR_Wheel.jpg

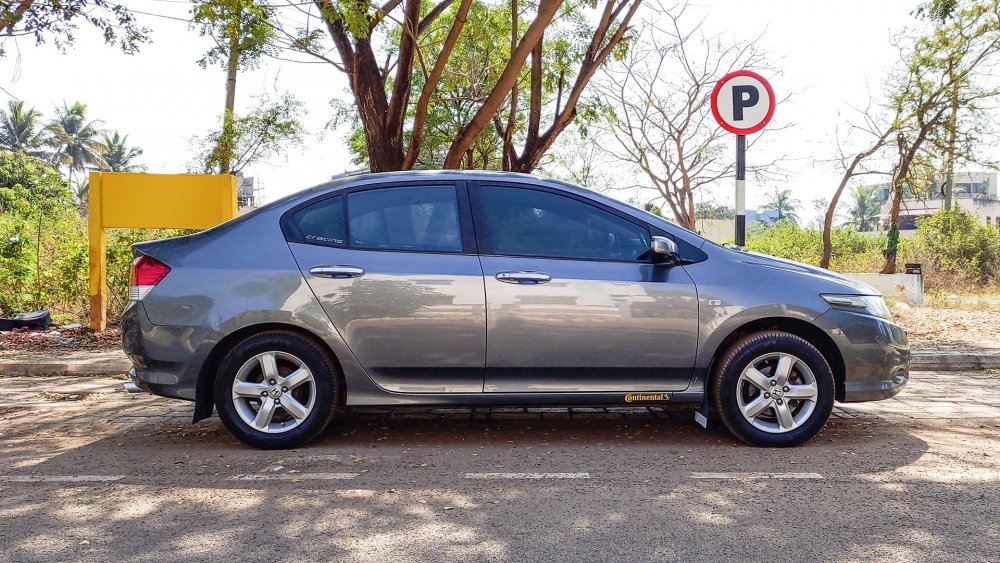
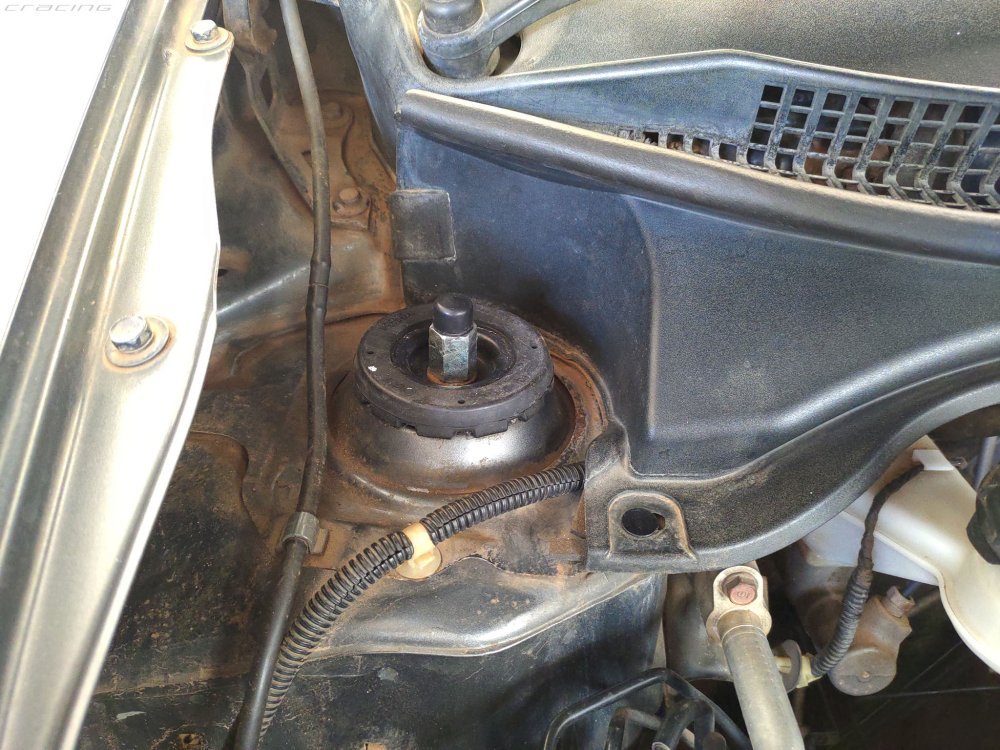
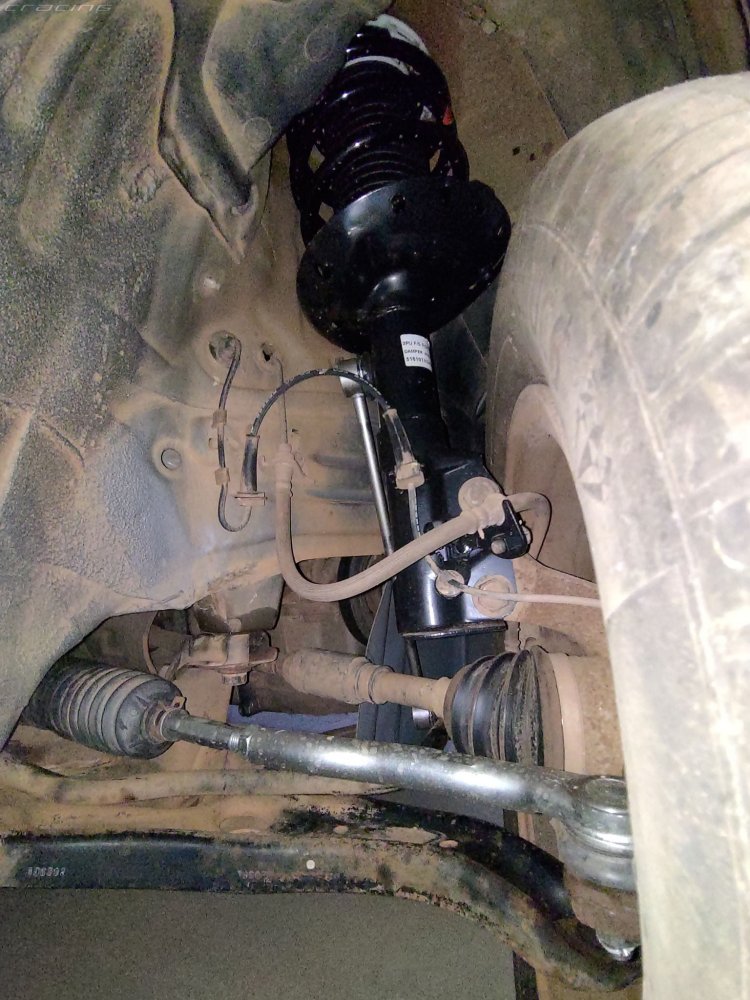
After installing new front suspension parts:
Driver_Side_03.jpg
Passanger_Side.jpg
Driver_Side_01.jpg
Driver_Side_02.jpg

Selective Service Invoice:
Car_Service_07-12-2022.jpg


Front Suspension Replacement Invoice:
Car_Repair_04-01-2023.jpg
 
Last edited:
Thread Starter #15
Joined
Oct 12, 2012
Messages
1,166
Likes
1,330
Location
Hubli
Hello,

I have received AMT coil spring buffers few days ago (From Autotrends) and took some time to test drive before making this post. Installation was effortless, again thanks to the steps in my car port. Size was correct and they fitted properly with the help of soapy water but after removing from jack, there wasn't much difference in height (Maybe 1cm only) because buffer thickness is same as the gap between the spring. Product description says increase upto 0.3 cm so there is that. Whereas Rogerab buffers are little thicker and said to increase height upto 6 cm but cost of the product is double! It also depends on the condition of the spring; if it has become too weak and sagged then we can see the difference in height but the life of the buffer will degrade and break apart because it has to take stress even when the car is standstill.

However, the buffers were still helpful for my car if not for height. Now the rear end is more stable, less bouncy and slightly stiff. With rear passengers and/or heavy load inside trunk, the car doesn't sag as much as before. Noise and vibration is also reduced somewhat. So far I haven't noticed any issues but I want to see what happens if the buffers are moved to the upper end of the spring because one reviewer said it improved the performance.
I have read multiple international forums that front lift after replacing strut assembly is pretty normal but it will bed in after sometime so I hope it happens with my car too and till then I shall enjoy the SUV comfort. [drive]

Here is how my car looks after installing the buffers:
CR_ANHC_AMT_Rear_Buffers_01.jpg
CR_ANHC_AMT_Rear_Buffers_02.jpg
CR_ANHC_AMT_Rear_Buffers_03.jpg
CR_ANHC_AMT_Rear_Buffers_04.jpg
CR_ANHC_AMT_Rear_Buffers_05.jpg

Coil spring before installing the buffer:
AMT_Buffers_01.jpg

Fitted the buffer to the middle of the coil spring and secured with cable ties but wheel is still on jack:
AMT_Buffers_02.jpg

Jack removed, wheels on ground and cable ties trimmed:
AMT_Buffers_03.jpg
AMT_Buffers_04.jpg
AMT_Buffers_05.jpg

My Bagheera also helped [:D]:
AMT_Buffers_06.jpg

My product unboxing video:

Product pictures:
AMT_Buffers_01.jpg
AMT_Buffers_02.jpg
AMT_Buffers_03.jpg

Product Link: Click here for Honda City 3rd Gen or here for all other cars
(Note: Buffer size differs with spring size so please check size chart given by manufacturer or seller and buy the one that is suitable for your car.)

Links to some of helpful info about coil spring buffers: How to measure, How to install and FAQ

Thanks...
Best Regards
 
Last edited:

Top Bottom