Maruti 800: Technical Issues & Solutions


Joined
Dec 26, 2013
Messages
277
Likes
379
Location
INDIA
Hello Shashi,
Received the gaskets today at 4 pm.
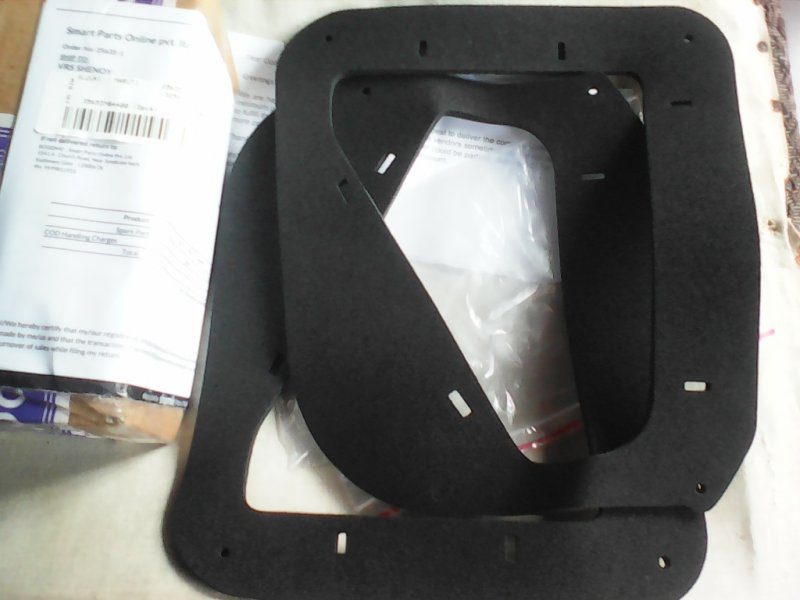
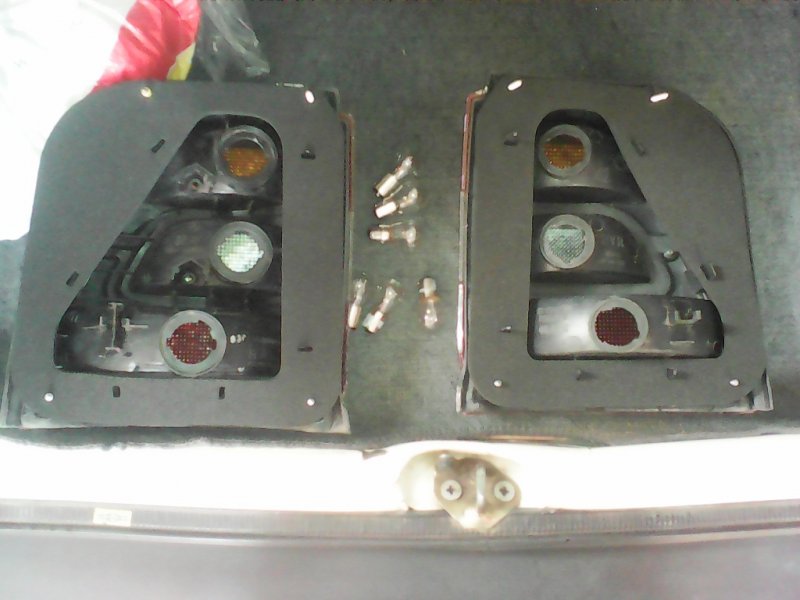
It was nicely packed, though it is thin gasket, not of rubber but looks like black foamy thing properly cut on machine with notches and holes for the screws to insert. I know it is to be fixed to the metal and not to the TL because TL is to be removed in case of replacing the bulbs and bulb holder if any.
What kind of glue did you you use? Quick fix or any other glue, pls do let me know.
Regards
No glue sir.

The gasket has to be applied to your TL, and if you notice, it has grooves made which sits with the grooves of your TL(if there is a groove in TL but not in gasket, make a small hole there). Then simply tighten the TL as you normally would. SInce its a foamy gasket, it compresses and seals eventually.

I read on some facebook page most likely, some idiots had pasted the gasket using anabond and what not. No need to do such stunts. :)

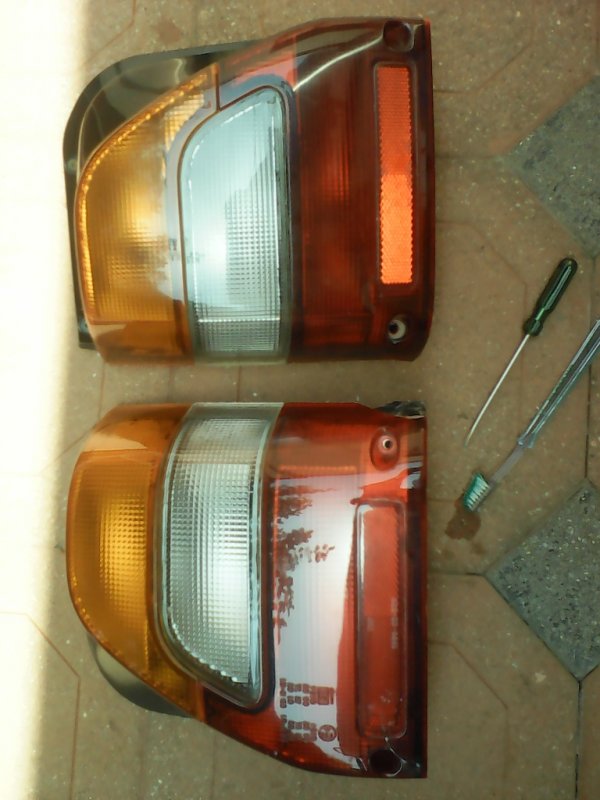
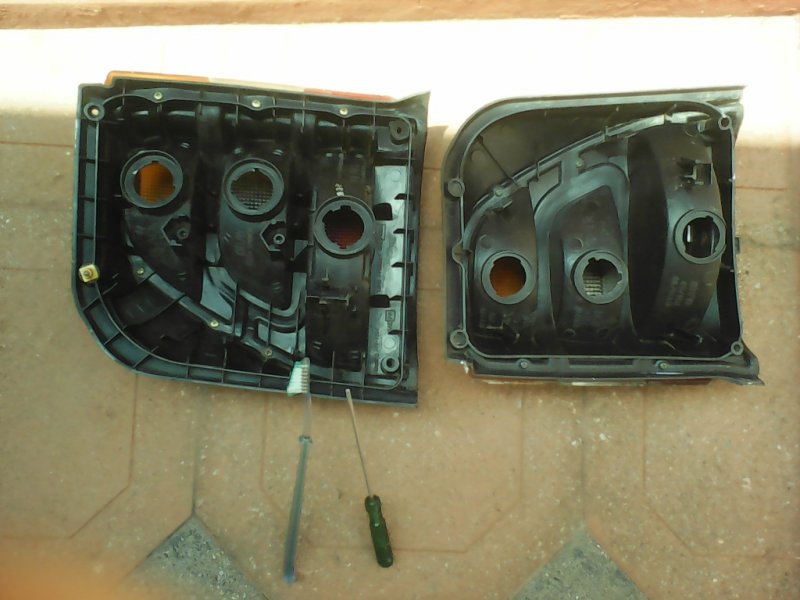
Open your TL, remove the bulbs, place the gasket properly on the TL, put back the bulbs and install. Simply said, you have to put the gasket in between body and the TL.

Regards,
Shashi
 
Last edited:
Joined
Apr 4, 2017
Messages
365
Likes
235
Location
Mangalore
Very small DIY on 24th April 2018 which took about 2 hours by waiting for about 1 ½ months to get the simple parts :

While during various tasks in the month of March 2018 (details already shared one by one in the month of March 2018 ).I had observed gaskets of TL lamps had become brittle and came out as pieces, that was the reason water while cleaning the car and water during monsoon used to enter and there was dust accumulation as well as rusting spots.

I did small DIY of cleaning those spots and painting last month. When inquired about the gaskets, I could not get them with main Maruti dealer and also with 40-50 small dealers. I was not interested to spend Rs 1200 – 1300 for a new set of TLs.

I have to sincerely thank you dear Shashi who gave the information about the availability of these Gaskets from Boodmo.com and also Driveright who gave the idea of using black foam to cut and make gaskets shapes in case gaskets were not available.

I placed the order with Boodmo for 2 nos gaskets on 12th April 2018 and sent money thru RTGS, however there was some confusion over there and finally they confirmed the order on 17th April and I got the gaskets on 23d April.

I started this fixing of gaskets on 24th morning but though it was simple DIY, took about 2 hrs. Out of 2 gaskets one nicely fitted in all the notches and screw holes in the left side stock TL, whereas the 2nd one fitted only with screw holes as that right side TL as it was replaced in 2009. First I removed all the bulbs and cleaned the TLs by water rinse and using a brush and sharp screw driver. I plugged the hole in the right hand side with M – Seal and it will dry and become harder automatically.

After TLs were dried in the sun fully, I tried to fix the TL, the gaskets nicely fitted in them. A small problem came up, they needed screws with ¼ inch extra length, so walked in the hot sun for about 1 /2 hour to get those 8 screws from a hardware shop. With these new screws, the gaskets and TL were nicely fitted.

Well, the total cost : Rs 86 for 2 gaskets + Rs 4 for RTGS charges + Rs 10 for 8 screws and washers + Rs 10 for M - Seal = Total Rs 110.
 

Attachments

Joined
Dec 26, 2013
Messages
277
Likes
379
Location
INDIA
Excellent. Which brand TLs is the left one?? I see something written below the reflector but its not visible. Is it Alpha Toyo or IJL??

Also one of your lamps is slighly broken from side. Its the Lumax one most likely on right
 
Joined
Apr 4, 2017
Messages
365
Likes
235
Location
Mangalore
Excellent. Which brand TLs is the left one?? I see something written below the reflector but its not visible. Is it Alpha Toyo or IJL??

Also one of your lamps is slighly broken from side. Its the Lumax one most likely on right
The left side stock TL is IJL - Part no: 35603M8443. On the Right side TL nothing is written there, just some numbers, may be some code. That was replaced in 2009 and I was not much aware of the brands etc at that time, just got it replaced at the cost of Rs 600 with fixing charges.

Yes, small tip on both TL are broken but I don't think it allows the water to get inside.
 
Joined
Oct 7, 2015
Messages
384
Likes
478
Location
Bengaluru
Very small DIY on 24th April 2018 which took about 2 hours by waiting for about 1 ½ months to get the simple parts :

While during various tasks in the month of March 2018 (details already shared one by one in the month of March 2018 ).I had observed gaskets of TL lamps had become brittle and came out as pieces, that was the reason water while cleaning the car and water during monsoon used to enter and there was dust accumulation as well as rusting spots.

I did small DIY of cleaning those spots and painting last month. When inquired about the gaskets, I could not get them with main Maruti dealer and also with 40-50 small dealers. I was not interested to spend Rs 1200 – 1300 for a new set of TLs.

I have to sincerely thank you dear Shashi who gave the information about the availability of these Gaskets from Boodmo.com and also Driveright who gave the idea of using black foam to cut and make gaskets shapes in case gaskets were not available.

I placed the order with Boodmo for 2 nos gaskets on 12th April 2018 and sent money thru RTGS, however there was some confusion over there and finally they confirmed the order on 17th April and I got the gaskets on 23d April.

I started this fixing of gaskets on 24th morning but though it was simple DIY, took about 2 hrs. Out of 2 gaskets one nicely fitted in all the notches and screw holes in the left side stock TL, whereas the 2nd one fitted only with screw holes as that right side TL as it was replaced in 2009. First I removed all the bulbs and cleaned the TLs by water rinse and using a brush and sharp screw driver. I plugged the hole in the right hand side with M – Seal and it will dry and become harder automatically.

After TLs were dried in the sun fully, I tried to fix the TL, the gaskets nicely fitted in them. A small problem came up, they needed screws with ¼ inch extra length, so walked in the hot sun for about 1 /2 hour to get those 8 screws from a hardware shop. With these new screws, the gaskets and TL were nicely fitted.

Well, the total cost : Rs 86 for 2 gaskets + Rs 4 for RTGS charges + Rs 10 for 8 screws and washers + Rs 10 for M - Seal = Total Rs 110.
nothing like when the job goes well as planned [clap]! this foam material is available in hobby and craft stores .good job Shenoy sir
 
Joined
Apr 4, 2017
Messages
365
Likes
235
Location
Mangalore
nothing like when the job goes well as planned [clap]! this foam material is available in hobby and craft stores .good job Shenoy sir
I was thinking to do the same way you did, had I not got these from Boodmo.com. But they are done on a pre - programmed cutting machine and hence nicely fit in the notches and screw holes. Hope now this gives protection from the water getting inside , thereby causing rusting. Also plugged gaps by M- seal to avoid any rain water splashing and coming inside.
 
Joined
Apr 4, 2017
Messages
365
Likes
235
Location
Mangalore
Yes sir they are punched out using machine from a foam sheet and you can do a decent enough job with steady hands and a surgeons Blade [;)]
yes, I agree. You and Silver_dove have done more DIY than others and also have kept many tools to do these tasks. Actually all these DIY is not to save money but to get a kind of happiness in doing such tasks.
 
Joined
Oct 15, 2012
Messages
95
Likes
29
Location
MUMBAI
Dear i am willing to give my M800 , to any one from mumbai or vasai for any diy as i am leaving mumbai and will not be taking the car with me. any volunteer may call , body is not rusted and mechanicals are maintained nicely by myself doing diy.
 
Joined
Apr 4, 2017
Messages
365
Likes
235
Location
Mangalore
Dear i am willing to give my M800 , to any one from mumbai or vasai for any diy as i am leaving mumbai and will not be taking the car with me. any volunteer may call , body is not rusted and mechanicals are maintained nicely by myself doing diy.
All the Best to you in your Future assignment but stay in touch with the group as you are one of the DIY Experts.
 
Joined
Oct 9, 2012
Messages
1,888
Likes
2,180
Location
Riyadh/Kanpur
I came across this Best Car Wash, which I have n't seen any where and felt like sharing, so others can do it next time to keep their car shiny outside and also inside !!!!!!
Looks like i20 car
By Joe so much foam inside the car, how the bloodyhell will they dry it? And in how many days?

People really go insane to take care of their whip.

Thanks for sharing @Shenoy ji.
 
Joined
Apr 4, 2017
Messages
365
Likes
235
Location
Mangalore
By Joe so much foam inside the car, how the bloodyhell will they dry it? And in how many days?

People really go insane to take care of their whip.

Thanks for sharing @Shenoy ji.
It is very risky to do this kind of wash. The water may enter anywhere and might damage the parts, especially electrical and control points.
 
Joined
Jun 19, 2014
Messages
124
Likes
175
Location
Gaia's lap
Hi everyone,
Sorry for the off topic here.
The car in the pic isn't a Honda. It is a 2012 Perodua Alza.

I had got the engine oil changed in my car and this time I decided to try out AcDelco 5W40 API SN, which claims to be Fully Synthetic.
I haven't run much, but the car feels very rough on idling. I can feel the vibrations through the steering wheel and pretty much anything I touch inside the car. Castrol was much smoother.

I have this new thing of ignition going out. I had checked the terminals, one of them was loose. Fixed it but still at times it happens. Tried cranking last night, no response. I disengaged he handbrake and the car moved back a bit, and the ignition lit up!

Regards,
Astralbliss
 

Top Bottom