Maruti Suzuki Brezza ZXi+ AT (Magma Grey) - Ownership Log


Thread Starter #16
Joined
Dec 29, 2015
Messages
343
Likes
337
Location
Hyderabad
1,000 kms done
1,000 km Done.jpg

FIRST SERVICE DONE @ 1,019 kms
1st Service = 1,019 kms
First Service Odo.jpg


Screenshots from the MS Rewards application
MS Rewards - First Service Screens.jpg

  • Completed 1,000 kms in 27 days. Went to MASS (near to my workplace) and handed the car for the 1st Service which is more of a general check and car wash. Nothing more than that.

  • Handed the car at 9 am and received it back by 11:30 am. No amount was to be paid as nothing was done.
 
Last edited:
Thread Starter #17
Joined
Dec 29, 2015
Messages
343
Likes
337
Location
Hyderabad
THINKDIAG OBD 2 SCANNER
  • Read/clear fault codes,
  • Read live data,
  • Read control module information,
  • Actuation tests and
  • Maintenance functions for ECM, BCM, SRS, TCM, BMS, TPMS, SAS, A/C system
Package Contents
THINKDIAG Scanner.jpg


Available Maintenance Functions
Maintanence Functions.png


Scanner connected to the OBD 2 port
67. OBD II Port with OBD Scanner.jpg


VIN Decoded by the scanner
VIN Decoded.jpg


Speed vs RPM Data @ 80kmph, 90kmph, 100kmph, 110kmph and 120 kmph
Speed vs RPM.jpg


Energy Flow Data = Li-Ion Battery State of Charge (SoC) = From 50% to 80%
Lead battery charge state - 50 to 80%.jpg

Adding a few videos that I recorded (Screen Recording)


Thread Starter #18
Joined
Dec 29, 2015
Messages
343
Likes
337
Location
Hyderabad
9" SMARTPLAY PRO+ HU

Boot Up - Suzuki Logo
1726800422239.jpg
Home Screen with touch-sensitive buttons on the base of the screen
Home Screen.jpg
Audio Settings - Equalizer; Balance & Fader and Surround Sense
Audio - Settings.jpg
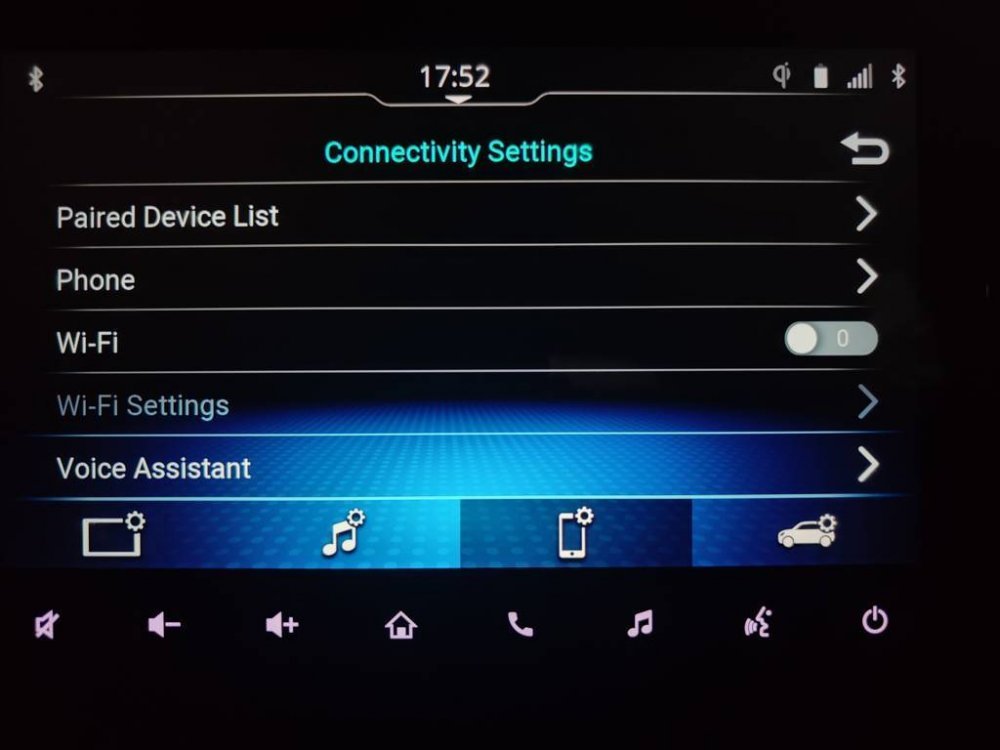
Connectivity Settings
Connectivity Screen.jpg
Media Sources. Love the "AV Off" option
Media - Source Options.jpg
Quick Access drop-down menu
3.jpg
System Info and Software Update Screen
System Indo and Software update.jpg
Vehicle Dashboard and Fuel Economy Screens
Avg FE.jpg
Vehicle Alert Screens
Vehicle Alerts1.jpg
Audio - Volume Level Settings
Volume Settings1.jpg
Welcome Message Screen
Welcome Message Screen-tile.jpg
Display Settings
Display Setting.jpg
Media Settings
Media Settings.jpg

Media Settings1.jpg
System Settings
System Settings.jpg
Smartphone Connected through Bluetooth
Smartphone connected for Audio.jpg
Standby Screen
Standby Screen.jpg

Alert/Warning - Seat Belt
1728391383793.jpg

Energy Flow schematic as seen on the HU
1728306447736.jpg
Wireless Charger - Turning it ON and OFF
Wireless Charger.jpg

WIRELESS ANDROID AUTO
  • This is one feature I appreciate since the hassles of dangling cables are minimized. Also, many issues concerning Android Auto disconnecting or not pairing are happening with HUs where the connection is through the cable. Here with the option of wireless connecting, it is better and stable.

  • The connection process is easy and takes under a minute to connect to Android Auto wirelessly. There have been no issues with the smartphone heating up once connected.
Home Screen. Press on the 'Arrow' below the 'Time' displayed to get access to the WiFi option
1.jpg
Press the 'WiFi" button to turn it ON
3.jpg
On the Home Screen, press the "Paired Devices" button to enter the list of smartphones paired with the HU. Click on the 'Android Auto" icon on the list of devices one prefers to connect with. In my case, 'Realme GT 2 Pro'
2.jpg
Upon pressing the 'Android Auto' button, this prompt appears. Press 'YES' to proceed
4.jpg
Connection in progress - It takes 4-5 seconds to connect to Android Auto
5.jpg
The 'Android Auto' icon changes to 'Yellow' colour once it is active
6.jpg
Home Screen changes and displays the smartphone connected and Android Auto is active (extreme left tab)
1. Home Screen.jpg
Media Source options now display Android Auto
7.jpg
Tapping on it opens the Android Auto screen
9.jpg
Google Maps Running
10.jpg
Home Screen with Directions displayed when Google Maps is active
8.jpg
Directions information is displayed on the MID at the same time
11. Android Auto.jpg
Android Auto - Directions prompted (To go straight) on MID and HUD with distance
Android Auto - Go straight prompt.jpg
Android Auto - Directions prompted (U-Turn) on MID and HUD with distance
Android Auto - U Turn prompt.jpg
 
Last edited:
Thread Starter #19
Joined
Dec 29, 2015
Messages
343
Likes
337
Location
Hyderabad
CAR CARE PRODUCTS PURCHASED SO FAR

Set of Brushes from Amazon (Finer one for interiors, the green one is for wheel liner area)
Different Brushes for Cleaning.jpg
Ecstar Premium Car Care Kit (FOC from the dealership during delivery)
MGA - Car Care Kit.jpg
StarQ Aquablast 2.6 Pressure Washer
StarQ AquaBlast 2.6 Pressure Washer.jpg
I washed the car 3 times so far using the Ecstar shampoo. Foaming works well but for better quality foam from the pressure washer I will be buying a different shampoo once the bottle of Ecstar shampoo exhausts
IMG20241006173402.jpg

WaveX Microfibre Sponge applicator set - For polish applications etc
WaveX Sponge for Polishes etc.jpg

Meguiars - Hybrid Ceramic Wax Spray (Yet to put this to use)
WhatsApp Image 2024-09-28 at 14.39.50_a5afeac5.jpg

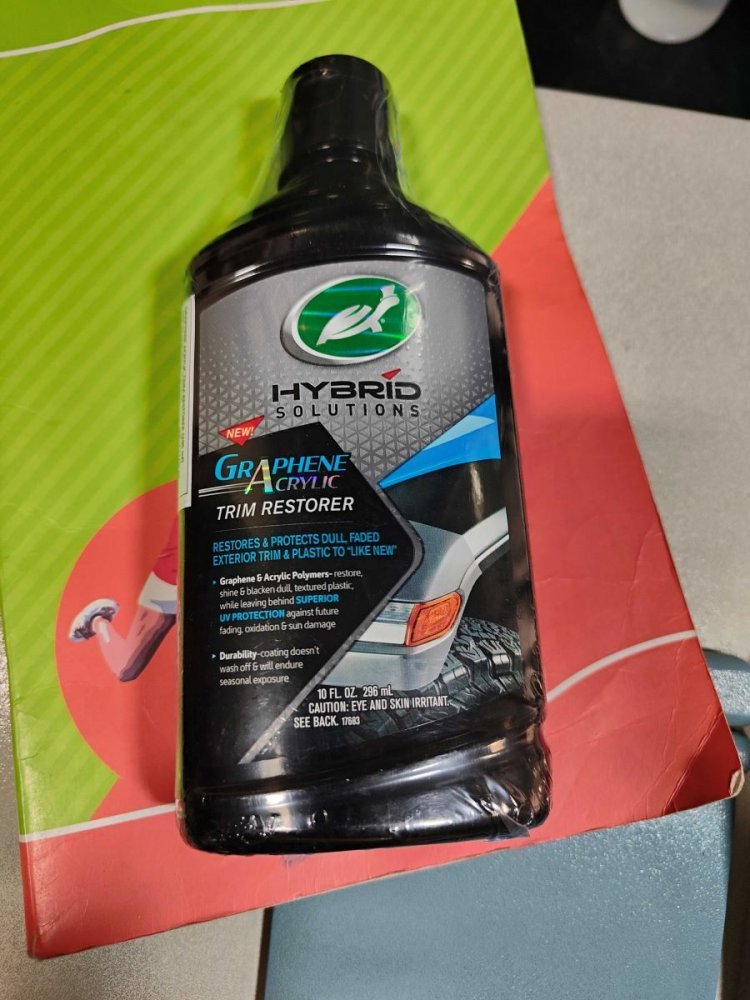
Turtle Wax Graphene Acrylic Trim Restorer (Yet to apply this to the cladding and wiper panels)
Turtle Wax Graphene Trim Restorer.jpg

Not photographed but I have purchased the following items too:
  • WaveX Ultrafine Foam Sponge applicator (Black, round) - I will be using this for applying the trim restorer to the cladding

  • ShineXPro Microfiber Cloth For Car - 1100GSM Super Absorbent Towel for drying the car post-wash - Works flawlessly.

  • ShineXPro Ultimate Dashboard Polish & Protectant.
 
Last edited:
Thread Starter #21
Joined
Dec 29, 2015
Messages
343
Likes
337
Location
Hyderabad
TURTLE WAX GRAPHENE ACRYLIC TRIM RESTORER (Hybrid Solutions)
  • Graphene & Acrylic Polymers restore, shine, and blacken dull textured plastic
  • Leaves behind superior UV protection against future fading, oxidation, and sun damage
  • Dry to the touch within minutes of application
  • The coating doesn’t wash off and will endure seasonal exposure
  • Protects surfaces from fading due to the elements, car washing, and road salts

Botlle of Turtle Wax Graphene Trim Restorer; Sponge applicator for easy and even application
1. Foam applicator.jpg

Gloves are required to be worn
2. Gloves.jpg
  • Step 1: Thoroughly clean and dry area to be restored. Shake well before using. Wear gloves before beginning the process
  • Step 2: Apply a small amount of product onto a foam applicator or microfiber towel. Using a combination of back & forth, & circular overlapping motions, treat the area to be restored.
  • Step 3: Reapply a small amount of product until the area to be treated is covered. Let dry to touch. After 2-3 minutes, reapply a second coat for an even appearance.
  • Step 4: Use circular motions to apply, with light pressure to blend and level.
Front-wheel cladding - Untreated
3. Cladding Untreated.jpg

Front-wheel cladding - Untreated
4. Cladding Untreated (Front).jpg

Front bumper - Untreated vs Treated
5. Untreated vs Treated.jpg

Rear-wheel Cladding - Untreated
6. Cladding Untreated (Rear).jpg

Rear-wheel Cladding - Treatment WIP
7. Rear wheel cladding.jpg

Rear-wheel Cladding - Treated
8. Cladding Rear - Treated.jpg

Front-wheel Cladding - Treated
9. Cladding Front - Treated.jpg

Door Cladding - Treated
10. Door Cladding - Treated.jpg

Rear Bumper - Treated
11. Rear Bumper cladding - Treated.jpg

Rear Bumper - Treated
12. Rear bumper cladding - Treated1.jpg

Front Bumper - Treated
13. Front bumper cladding - Treated.jpg
  • Since the car is new and the cladding is not so faded, the actual results are not seen as they should.

  • It did rain immediately after applying this treatment, a wash should reveal how well this coating helps. I'll update the thread accordingly (with pictures) once I wash the car this weekend.
 
Top Bottom