The Grey Skid – Chevy Beat TCDi LS (December 2012)


Thread Starter #391

deville_56

Honoured Member
Joined
Sep 11, 2009
Messages
2,974
Likes
4,815
Location
Trivandrum
That's a very good workmanship you did. Congratulations for this.
In your video the wiper arm looks to be a size too large/long, almost touching the rear spoiler!! As if it's from another Chevrolet hatchback.
Maybe it's the camera angle, don't know. But still, very good workmanship, as well as execution, no doubt about that!!
TY. It's the shadow of the spoiler playing the trick. There is about a centimetre or two gap on the top. Because of this minute gap, I didn't risk going for the i10 wiper without testing. It had better shape and angle.
 
Thread Starter #392

deville_56

Honoured Member
Joined
Sep 11, 2009
Messages
2,974
Likes
4,815
Location
Trivandrum
April 2022 - LT Combination Switch

Ordered LH combination switch from Boodmo after searching regular spare shops. Right and left sides were available separately. One of the spare guys argued it came as a single assembly.

2022-04-24 10-40-22.jpg


Wiper Switch Assembly (LT) - J42566822 - ₹ 689.00 + ₹ 50.00 Shipping

2022-04-19 10-07-00.jpg


2022-04-24 10-40-44.jpg
2022-04-24 10-40-52.jpg
2022-04-24 10-40-56.jpg


Daewoo branding and made in Korea.

2022-04-24 10-40-47.jpg


Installation. Removing the steering column covers. Just three screws and the bottom will come off. Top will be loose, but can't be removed with the speedometer assembly sitting on the top. Complete disassembly not required, can be done by removing the bottom half only. Just for the sake of exploring further.

2022-04-24 10-55-17.jpg
2022-04-24 10-55-40.jpg
2022-04-24 10-56-00.jpg
2022-04-24 10-56-23.jpg


Removing speedo - one nut underneath.

2022-04-24 11-00-35.jpg


Another one behind.

2022-04-24 11-34-05.jpg


The assembly would come off.

2022-04-24 11-33-36.jpg


Pry open the rear cover

2022-04-24 11-33-08.jpg


and unplug the connectors. Ensure the battery is disconnected beforehand.

2022-04-24 11-32-08.jpg


2022-04-24 11-31-26.jpg


Now the top cover would be free.

2022-04-24 11-03-25.jpg


Now, acres of working space.

2022-04-24 11-03-32.jpg


Removing the stalk is pretty easy. Press the locks on both sides

2022-04-24 11-07-51.jpg


and pull out.

2022-04-24 11-07-54.jpg


Unplug the connector. Found a smaller connector, which should be for steering controls, I guess.

2022-04-24 11-05-01.jpg


Lower variant vs LT stalks.

2022-04-24 11-05-52.jpg


Both had 9 pins. I presume a surgical tab breaking procedure would've enabled all the functions.

2022-04-24 11-06-15.jpg


The connector

2022-04-24 11-09-22.jpg


and it's pin out.

2022-06-13 20-15-09.jpg


Installing the new stalk assembly. Just push it into the slot, and it locks in.

2022-04-24 11-10-07.jpg


Make sure to plug in the connector before slotting it in.

2022-04-24 11-10-28.jpg


Covers are made by Tata Autocomp
2022-04-24 11-28-32.jpg


Need hell lot of wire, two wires till the boot.

2022-04-24 15-46-51.jpg
2022-04-24 16-33-14.jpg


Used a bicycle cable wire to draw the wires.

2022-04-24 16-33-20.jpg
2022-04-24 16-48-06.jpg


Finally, the connector.

Red - Positive.
Yellow - Negative/ground.
Green - Park.

2022-04-24 17-11-10.jpg


Connection complete.

2022-04-24 19-44-46.jpg


Working late.

2022-04-24 19-44-53.jpg


Pending work - rear washer.
 
Thread Starter #393

deville_56

Honoured Member
Joined
Sep 11, 2009
Messages
2,974
Likes
4,815
Location
Trivandrum
April 2022 - Hacking into Stock Fog Lamp Wiring

Found two years back that the car had all necessary hardware for plug-and-play addition of fog lamp, but failed to activate it and left it alone. Thought only adding an OE RH stalk from LT variant would activate it. While wiring the rear wiper, gave a second attempt, which failed as well. Always tried with the couple disconnected. In Shikkari Shambu mode, plugged the coupler back while the pins were shorted and the fog lamp indicator lit up on the console. Checked the connections in the fusebox and there was +12 V, first ray of hope.

The RH side stalk coupler. Three wires on the switch side and five on the mating connector. Shorting the missing two would activate the fog lamp (only) when the park light is turned ON.

2022-04-25 16-00-16.jpg
2022-04-25 16-00-28.jpg
2022-04-25 16-00-42.jpg


I had no matching connectors, and the only possibility was splicing the stock harness. The connector had close resemblance to an ATX connector, and dug up the scrap to find a 20-pin connector from an old SMPS.

2022-04-25 16-09-10.jpg


Scavenged two female clips with wire.

2022-04-25 16-14-56.jpg


Slotted perfectly in the connector. Plugged the connector back.

2022-04-25 16-15-52.jpg


My Esteem fog lamp switch.

2020-09-23 19-54-23.jpg


Swapped the input and output with the newly found connections.

2022-07-11 19-02-04.jpg


Needed relay and fuse to complete the circuit.

2020-02-23 14-40-03.jpg

2020-02-23 14-39-56.jpg


The fog lamp was previously wired with a right-size relay, the only slim relays I had.

2022-04-25 17-13-44.jpg
2022-04-25 17-13-49.jpg


Plugged them in.

2022-04-25 17-14-10.jpg


Blew the fuse during previous attempts. Bought a couple of them. Low profile fuses.

2022-04-25 17-19-15.jpg


Plugged them in.

2022-04-25 17-19-42.jpg


The old to-be-removed hardwiring.

2020-02-23 16-28-26.JPG


2022-04-25 17-39-16.jpg


2022-04-25 17-39-57.jpg


and the unused stock wiring.

2022-04-25 17-39-20.jpg

2022-04-25 17-39-28.jpg


Direct plug and play for H27 bulb.

2022-04-25 17-42-00.jpg
2022-04-25 17-42-14.jpg


Successful.

2022-04-25 17-43-08.jpg
2022-04-25 17-43-15.jpg


Windscreen washer tank.

2022-04-25 17-50-37.jpg


Space for rear washer motor.

2022-04-25 17-50-41.jpg


Installed back. LH park light holder got cracked over time and bulb won't fit properly causing loose contact.

2022-04-25 19-18-43.jpg


I'm not liking the Chevy clips. Replaced them with Maruti clips, as I had plenty of them.

2022-04-25 19-57-01.jpg
2022-04-25 19-59-34.jpg


This flat head screw installed by the dealer has been irking my OCD for quite some time.

2022-04-25 19-59-45.jpg


Replaced with Honda OE star screw, which was restocked for the Dio.

2022-04-25 20-00-52.jpg


Signs of alien invasion.

2022-04-25 20-00-57.jpg


Voila. The fog lamp indicator.

2022-04-25 20-05-09.jpg


OE fog would stay on like in Marutis when the key is out when we forget to turn off the fog lamp switch and leave the park lights on, not to my liking. Added back the ACC connection to the fog lamp switch.

2022-04-25 16-24-24.jpg


and used a cube relay to control the stock fog lamp wiring. Now fog lamp works only with park light + key on + fog lamp switch. Perfect okay.

2014-04-19 12-35-32.JPG


With his predecessor.

2022-04-25 13-05-34.jpg
 
Thread Starter #394

deville_56

Honoured Member
Joined
Sep 11, 2009
Messages
2,974
Likes
4,815
Location
Trivandrum
May 2022 - Oil Change with Flush

New tenant under hood. Kids call her Liza.

2022-04-30 08-36-56.jpg


Cozy nap.

2022-04-30 14-43-19.jpg


Only thing that brings her out.

2022-05-01 10-41-00.jpg


Went to Chevrolet SVC in search of a drain bolt, but no stock and needed ordering. Current OE oil for Beat, Total Quartz 7000 Future GF5 5W30 API SN. Manual says ACEA A3/B4.

2022-05-04 14-59-15.jpg


Bought Wurth Synthetic 5W30 from Capital Automobiles when I checked in for the drain plug. Met the OEM specifics than the OE provided oil [gun]. MRP ₹ 2,115.00, got 10% off, with a retail price of ₹ 1,900.00.

2022-05-08 15-30-29.jpg
2022-05-08 15-30-34.jpg


Got rest of the parts from Kakkassery Automobiles.

Oil Filter - Purolator PI-5384 - MRP ₹ 200.00. Got for ₹ 180.00.

2022-05-08 13-17-40.jpg


Also, got the rare drain bolt from there. ₹ 80.00 compared to ₹ 254.00 for OE bolt. Apparently, Americans don't like crush washers.

2022-05-08 12-26-53.jpg
2022-05-08 12-26-57.jpg


Size 15 mm.

2022-05-08 12-27-06.jpg


Also bought oil flush since it has never been flushed. Abro Motor Flush ₹ 330.00 (MRP ₹ 345.00)

2022-05-08 12-46-00.jpg
2022-05-08 12-46-03.jpg
2022-05-08 12-46-07.jpg
2022-05-08 12-46-11.jpg


The bent bolt that prevented from DIY oil change.

2022-05-08 12-34-07.jpg


The sump protector.

2022-05-08 12-31-45.jpg


Managed to pull it down to make enough room and my first DIY oil change on Skids commenced.

2022-05-08 12-33-11.jpg


Made sure the drain bolt can be removed before adding the flush.

2022-05-08 12-34-00.jpg


Scars on the sump. The guard was a later recall/FOC addition.
2022-05-08 12-34-45.jpg


Very cute if I post on Insta or FB, but was really annoying when working under the car.

2022-05-08 12-36-08.jpg


Dumped in the flush.

2022-05-08 12-47-49.jpg


Idled for 3 minutes as instructed and drained.

2022-05-08 12-55-19.jpg


Accessing the oil filter. Windscreen washer tank neck can/needs (to) be removed.

2022-05-08 12-58-20.jpg
2022-05-08 12-58-23.jpg
2022-05-08 13-02-49.jpg


AC plumbing also needs to be removed.

2022-05-08 13-02-10.jpg
2022-05-08 13-02-14.jpg


Ratchet fits in with the shorted extension. A universal joint could save these steps. Socket size is 32 mm.

2022-05-08 13-02-43.jpg


Oil filter comes off.

2022-05-08 13-05-16.jpg


Quite some oil in there. Soaked and squeezed out with a rag.

2022-05-08 13-05-35.jpg


Muck!

2022-05-08 13-06-11.jpg


No oil goes wasted.

2022-05-08 13-14-58.jpg


New filter.

2022-05-08 13-17-59.jpg
2022-05-08 13-18-06.jpg
2022-05-08 13-18-11.jpg


New vs. old.

2022-05-08 13-26-56.jpg


Comes with O-ring, which was promptly replaced.

2022-05-08 13-18-19.jpg
2022-05-08 13-21-31.jpg
2022-05-08 13-22-01.jpg


Cleaned up.

2022-05-08 13-29-51.jpg


and installed new filter.

2022-05-08 13-31-03.jpg


Waited for the (presumably) last drop.

2022-05-08 15-01-25.jpg


New drain plug installed. Applied some gasket sealant on the thread to prevent any leak.

2022-05-08 15-03-17.jpg


Replaced the rusty nuts and bolts of the sump guard. The bent bolt remained untouched.

2022-05-08 15-09-21.jpg
2022-05-08 15-22-59.jpg


Wurth watermark inside out.

2022-05-08 13-23-24.jpg
2022-05-08 13-24-03.jpg


Poured fresh oil and waited till max output.

2022-05-08 15-31-31.jpg
2022-05-08 15-34-02.jpg


Idled and cooled and perfect oil level.

2022-05-08 16-04-47.jpg


Oil was sticky, refusing to flow.

2022-05-08 16-01-11.jpg


Previous oil was Shell Helix HX8, just 200 ml depleted in a year with around 4000 km usage.

2022-05-08 16-02-50.jpg
 

Attachments

Thread Starter #396

deville_56

Honoured Member
Joined
Sep 11, 2009
Messages
2,974
Likes
4,815
Location
Trivandrum
Nice DIY.
Looks like everything is very tight fit with dearth of space to remove oil filter.
Are you sure there is no other way than removing AC plumbing in order to reach the filter??
Can be done without removing the AC plumbing, but ratchet keeps hitting and very little arc of movement. Freeing up makes it a lot easier. Can be solved with a universal joint or a flexible extension.
 
Thread Starter #397

deville_56

Honoured Member
Joined
Sep 11, 2009
Messages
2,974
Likes
4,815
Location
Trivandrum
May 2022 - Rear Wheel Bearing Replaced

LH rear wheel bearing conked off making woo-woo noise on moderate speeds. RH was replaced back in 2017. As usual, took it to the FNG.


2022-05-16 11-38-12.jpg


2022-05-16 11-35-03.jpg


Removed the bearing from the hub. OE bearing (Made in Korea) was ₹3,557 and no one stocked due to the high price. For rough comparison, Swift bearing priced around ₹700 and Polo ₹2000. Tried cross-matching with other OE parts, but nothing suited.

2022-05-17 16-02-06.jpg
2022-05-17 16-02-30.jpg
2022-05-17 16-02-34.jpg
2022-05-17 16-02-44.jpg


Ended up replacing the hub assembly. Paid total ₹ 3,800.00, part plus labour.

Aux Bearings Rear Hub Unit - 96471775/96471776 ABS - MRP ₹ 2,884.00.

2022-05-17 16-03-38.jpg
 
Thread Starter #400

deville_56

Honoured Member
Joined
Sep 11, 2009
Messages
2,974
Likes
4,815
Location
Trivandrum
May-June 2022 - Updates

Quick rain run.

2022-05-28 15-41-20.jpg
2022-05-28 15-42-03.jpg
2022-05-28 15-57-46.jpg
2022-05-28 16-09-08.jpg
2022-05-28 16-44-12.jpg


New DIY LEDs for number plate illumination.

2022-05-22 12-21-33.jpg


Number plate light housing of not so great quality. Cracked due to heat of the incandescent bulb. Part number J95217398 and comes as full set with two housings, holder, and Y cable with connector, priced at ₹308.00.

2022-05-23 19-09-06.jpg
2022-05-23 19-09-16.jpg


Manufactured by Neolite.

2022-05-23 19-09-11.jpg


Old temp setup, when the car wasn't mine [lol]

2022-05-23 19-14-06.jpg


Paint spray.

2022-05-23 19-14-14.jpg


Cleaned up the best possible with thinner and finished with 3M FinishIt Compound.

2022-05-23 20-53-26.jpg


Trial.

2022-05-23 21-02-11.jpg


Set to install.

2022-05-23 21-02-57.jpg


Done.


2022-05-23 21-09-47.jpg


Fixed the issue with cracked front park light holder.

2022-06-04 23-15-15.jpg
2022-06-04 23-15-28.jpg


Reverse parking voice assist was acting up again.

2022-05-25 22-44-44.jpg


Voice enable/disable switch was gone.

2022-05-28 12-09-27.jpg

2022-05-28 12-09-45.jpg


Removing it was tricky with double-sided soldering and the display blocking the other side.

2022-06-04 22-51-12.jpg
2022-06-04 22-52-26.jpg


Osram Korea brake light bulb lasted 9 years.

2022-06-04 23-03-20.jpg


Replaced with Philips bulb.

2022-06-04 23-01-06.jpg
 
Thread Starter #401

deville_56

Honoured Member
Joined
Sep 11, 2009
Messages
2,974
Likes
4,815
Location
Trivandrum
June 2022 - (At last) Added Rear Windscreen Washer

Got a generic windscreen washer pump, costed ₹ 200.00

2022-06-09 16-52-15.jpg
2022-06-09 16-52-45.jpg
2022-06-09 16-52-52.jpg
2022-06-09 16-53-11.jpg


Searched for rear washer nozzles, but no one stocked any. All available was Maruti ones. Needed one with long neck and a right/acute angle trajectory. Bolero had a comparatively longer neck, while most of the others were flat/flush. Omni nozzle was available, but doubted fit in the tight space. Managed to get Bolero nozzle from a Mahindra pickup spare shop. No right angle, only jugaad will work. Would be replaced with OE nozzle.

2022-06-10 16-12-15.jpg
2022-06-10 16-12-38.jpg


Other pieces of hardware - 6 mm tube x 6 M and a couple of I-connectors.


2022-06-09 21-54-25.jpg
2022-06-10 16-14-37.jpg


Accessing the washer tank. Removed the RH headlamp and then the reservoir mouth. Can skip this, but gets more room to work around, especially with wiring and plumbing.

2022-06-12 13-12-07.jpg
2022-06-12 13-12-23.jpg


Then removed the RH fender liner.

2022-06-12 13-25-35.jpg


Three 10-mm nuts and the tank is all yours.

2022-06-12 13-25-43.jpg


Remove the connector and hose, or simply pull out the motor itself.

2022-06-12 13-29-47.jpg
2022-06-12 13-29-53.jpg
2022-06-12 13-30-17.jpg


Hole for front motor and location for rear motor sits on RH and front respectively.

2022-06-12 13-30-49.jpg
2022-06-12 13-30-52.jpg


Tank part numbers for reference.

2022-06-12 13-31-05.jpg


Spot the location.

2022-06-12 13-41-45.jpg


Circular saw bit

2022-06-12 13-53-47.jpg


and grinding bit

2022-06-12 13-54-03.jpg


and you get the perfect hole.

2022-06-12 13-50-38.jpg


Motor fits in perfectly without leak (tested).

2022-06-12 13-55-46.jpg


Part 2 - plumbing. Searching for hole to get the tube inside the cabin.

2022-06-12 14-10-45.jpg


Popped the smaller rubber grommet and there was a lot of room.

2022-06-12 14-14-28.jpg

2022-06-12 14-14-07.jpg


Removed the sill panels to draw the tubes to the rear, but ended up cleaning inside out.

2022-06-12 14-20-24.jpg


The grommet hack.

2022-06-12 14-32-21.jpg
2022-06-12 16-41-18.jpg


The tricky part was getting the tube inside the boot lid.

2022-06-12 16-51-37.jpg


Removing the spoiler.

2022-06-10 16-13-13.jpg


Remove the high mounter stop light and two 10-mm nuts on either side.

2022-06-12 16-58-28.jpg

2022-06-12 16-59-33.jpg


Two more 10-mm nuts under there. Nozzle should sit here.

2022-06-12 16-59-37.jpg


Two nuts each on either side.

2022-06-12 16-58-39.jpg


Spoiler comes out.

2022-06-12 17-01-35.jpg


Without the spoiler.

2022-06-12 17-01-24.jpg


There is a small plastic lid covering (blocking) the nozzle on the spoiler. Just one screw to remove it.

2022-06-12 17-01-38.jpg
2022-06-12 17-01-44.jpg
2022-06-12 17-03-00.jpg
2022-06-12 17-03-05.jpg


Tube out at the end.

2022-06-12 17-04-50.jpg


Drilled the hole

2022-06-12 17-11-39.jpg


Installed the nozzle.

2022-06-12 17-22-34.jpg


Installed motor and connected, but 6 M hose wasn't enough. Managed with a foot of petrol hose.

2022-06-12 17-27-58.jpg


Last leg, the wiring

2022-06-12 19-12-54.jpg
2022-06-13 16-29-33.jpg


Stalk connections for reference.

2022-06-13 20-15-09.jpg


Done.

2022-06-13 17-39-24.jpg


After final adjustment [sad]. OE nozzle is the way out. Let it be for the time being.

2022-06-12 18-45-30.jpg


Backflow. This caused great delay in pumping, causing the wiper to run dry a cycle before it's fed.


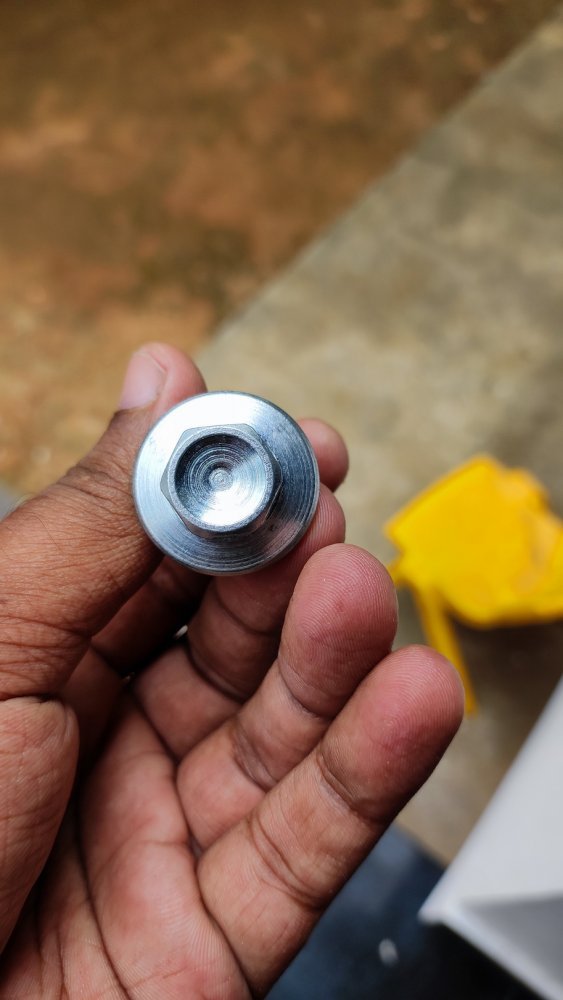
Solution, check valve. Bought these from Boodmo for Estilo sometime back, but never installed. Bought 2 of them, so had one spare. Hyundai part - 98886-34000, shared with every Hyundai model sold here with rear wiper starting from the Santro to Santa Fe and the KIAs. Costs ₹ 95. Mahindra part was available at ₹24 on recent search.

2022-06-10 16-16-02.jpg
2022-06-10 16-16-08.jpg
2022-06-10 16-17-13.jpg
2022-06-10 16-18-29.jpg
2022-06-10 16-18-37.jpg


Looks similar to normal connector.

2022-06-10 16-20-00.jpg


Result - instant jet without reverse flow.


Rear washer in action. Stream looked weird, but checked with Beat OE and Santro and they both had similar flow. Switching to OE nozzle might improve a bit.

 
Thread Starter #402

deville_56

Honoured Member
Joined
Sep 11, 2009
Messages
2,974
Likes
4,815
Location
Trivandrum
July 2022 - Misc Updates

Ordered number plates. Just missed getting challan'd, which would've been ₹3000. Got from Sagar, Chennai as usual. Paid ₹ 450.00 including shipping and delivered in 2 days via Delhivery. Packing was nice.

2022-07-05 13-34-35.jpg
2022-07-05 13-35-08.jpg
2022-07-05 13-35-38.jpg


Tried the XL-6 Harmon HU on Beat too, but SQ wasn't close to Pioneer with this one being designed for lower powered 25W OE speakers. Would fit with slight, but precise trimming of the trim.

2022-07-05 14-34-41.jpg


Installed back the Pioneer HU, but the itch for Android Auto remains.

2022-07-05 17-04-49.jpg


Back to aunt's home again.

2022-07-10 14-44-39.jpg
2022-07-10 14-46-58.jpg


Some off roading.

2022-07-11 09-42-18.jpg


77777 km

2022-07-11 10-17-21.jpg


Meets S-Presso for the first time.

2022-07-11 10-21-43.jpg
2022-07-11 10-21-57.jpg


Hill run, Ponmudi after a long time. Skids' second time.

2022-07-12 14-42-57.jpg
2022-07-12 14-43-15.jpg
2022-07-12 15-48-16.jpg
2022-07-12 15-48-44.jpg
 
Thread Starter #403

deville_56

Honoured Member
Joined
Sep 11, 2009
Messages
2,974
Likes
4,815
Location
Trivandrum
August 2022 - Updates

Running around as usual.

2022-07-25 12-32-44.jpg


Slight fungus build-up from a recent threw-up. Missed cleaning a spot under the seat.

2022-08-09 21-32-56.jpg


Dairy Milk art by niece.

2022-08-09 21-34-52.jpg


Cleaned up with VW interior cleaner and STP Tuff Stuff

2022-08-09 21-36-33.jpg
2022-08-09 21-36-42.jpg


Replaced cabin filter,

Purolator PI-2307 - ₹ 328.00

2022-08-10 08-43-28.jpg
2022-08-10 08-43-37.jpg


New vs. old

2022-08-10 08-44-02.jpg


Installed

2022-08-10 08-44-28.jpg
2022-08-10 08-44-47.jpg


Got moisture absorber from Flipkart. Worked well previously. Absorb-IT rebranded to CZ-IT. Still have 5 kg pellet left with me, but misplaced the can.

CZ-IT Refillable Moisture Absorber - ₹ 253.00

2022-08-19 16-30-35.jpg
2022-08-19 16-31-02.jpg
2022-08-19 16-31-20.jpg
2022-08-19 16-31-23.jpg
2022-08-19 16-31-29.jpg
2022-08-19 16-32-40.jpg
2022-08-19 16-33-22.jpg


Good during monsoons and long-term parking. Reduces moisture and prevents fungus build ups.
 
Last edited by a moderator:
Thread Starter #404

deville_56

Honoured Member
Joined
Sep 11, 2009
Messages
2,974
Likes
4,815
Location
Trivandrum
September 2022 - Updates

Hood Weatherstrip - J95954061 - ₹ 305.00

2022-09-11 11-05-47.jpg

2022-09-11 11-06-42.jpg


Lost these foam ends, causing seepage of leaf and debris under the hood.

2022-09-11 11-06-53.jpg


Perks of parking under the tree.

2022-09-11 11-12-45.jpg


and the bonus of the faulty strip.

2022-09-11 11-12-52.jpg


Cleaned the mess. See the missing end.

2022-09-11 11-19-32.jpg


Hard pull will leave these clips.

2022-09-11 11-20-22.jpg


Have to pluck them manually. Or have to remove with a prying tool or patient, gentle hands.

2022-09-11 11-21-37.jpg


New strip installed.

2023-02-02 17-42-30.jpg


2023-02-02 17-42-50.jpg


The foam end restricting access.

2022-09-11 11-29-41.jpg
2022-09-11 11-29-50.jpg


Next problem was seepage of water during rain drives and found to be through the retention clip hole. Clips were missing.

2022-09-11 11-09-04.jpg


Bought two of them.

Floor Carpet Retention Clip - J94525660 - ₹ 31.00

2022-09-11 11-06-16.jpg


Point-blank wash [sad]

2022-09-19 18-11-59.jpg


Managed to remove maximum black paint (and gold and unknown number of layers)

2022-09-19 18-16-46.jpg


Seven or eight coats/colours of paint. Freakan owned wheels.

2022-10-09 12-26-14.jpg


Even had some sticker work in between.

2022-10-09 12-26-19.jpg


It was easily peelable and satisfactory,

2022-10-09 12-27-35.jpg


until my BIL and his friend showed up and they took it over from there. Applied paint stripper,

2022-10-09 13-06-05.jpg


and made a mess and left after 4 hours of screwup, leaving me with this [frustration]

2022-10-09 13-26-23.jpg


Managed to strip it down to bare metal over 2-3 days of 30 min stripping. Both white and silver looked better.

2022-10-17 09-10-34.jpg
 

Attachments

Thread Starter #405

deville_56

Honoured Member
Joined
Sep 11, 2009
Messages
2,974
Likes
4,815
Location
Trivandrum
November 2022 - Updates

AC suddenly packed up like last time. I have been recommending this place to many, but never tried, so thought of going there. Checked gas pressure and there wasn't any left. Filled nitrogen to check for leak and there wasn't any leak either. Filled up gas and oil with guaranteed freezer effect [lol]. Charged ₹ 1,800.00.

2022-11-05 16-10-46.jpg


Gave a wash to the condenser. Till date, cools fast even under scorching sun.

2022-11-05 16-50-44.jpg


Next issue, recurrent service lights, but nothing on scans, all glow plugs fine, only remaining part to be checked being the glow plug controller. Couldn't get one to swap and check.

2022-11-06 11-27-48.jpg


Removed to check for any loose contact or burns. Pushing that notch up will release the controller. No tools required.

2022-11-06 11-28-12.jpg


Instantly spotted a weak wire. Suspected this as the indicator frequently lit up during alien activities.

2022-11-06 11-28-26.jpg


The couplers.

2022-11-06 11-30-29.jpg
2022-11-01 15-52-55.jpg


The controller. New one costs around ₹7500.00.

2022-11-01 15-51-38.jpg
2022-11-01 15-52-20.jpg


The new alien aka the service light activator.

2022-11-06 12-30-45.jpg
2022-11-07 15-18-11.jpg
2022-11-07 15-18-15.jpg


Inviting trouble, forgot closing passenger door window, and it was flooded inside during downpour.

2022-11-07 16-04-19.jpg


79k km without service light.

2022-11-13 09-10-19.jpg


Another ignored part, the fog lamp bezel. Has been so for long and forgot painting them.

2022-11-20 12-29-32.jpg


The magic potion.

2022-11-24 09-32-28.jpg


Zip-zap-zoom.

2022-11-24 09-32-33.jpg
2022-11-24 09-40-41.jpg
2022-11-24 09-58-59.jpg


Bosny grey primer

2022-11-24 10-03-48.jpg


and Esdee matt black, (new kid in block (in aerosol).

2022-11-24 10-09-05.jpg


I liked the finish of Esdee, similar to their regular automotive paint.

2022-11-21 16-55-04.jpg


Installed back.

2022-11-21 17-00-15.jpg


Newly found secluded beach with no rush. To and fro 50 km from home.

2022-11-24 17-21-25.jpg


Can take car to beach side.

2022-11-24 17-50-22.jpg
2022-11-24 18-28-06.jpg


Visited again after two days.

2022-11-26 16-53-33.jpg


Back with the Eco to steal the brand-new Amazon Basics vacuum cleaner.

2022-11-27 08-34-16.jpg


Aftermath, I hate the most.

2022-11-27 11-14-46.jpg
2022-11-27 11-20-59.jpg
2022-11-27 11-29-37.jpg


A thorough clean-up ensued.

2022-11-27 12-33-03.jpg


Went a bit in detail from curiosity.

2022-11-27 14-29-58.jpg


The dangling wires from the reverse sensor unit.

2022-11-27 14-12-01.jpg


Trimmed the length.

2022-11-27 15-44-08.jpg


Secured the unit properly.

2022-11-27 15-49-47.jpg


Remnant.

2022-11-27 14-55-18.jpg


Total 8.5 metres removed.

2022-11-27 18-25-57.jpg


Clean boot.

2022-11-27 16-02-54.jpg

All done and dusted.

2022-11-27 16-50-42.jpg
 

Top Bottom