Maruti 800 Interiors Renovation


Joined
Mar 28, 2012
Messages
582
Likes
81
Location
Lucknow
The light are looking very nice. But IMHO you could have used 4 LEDs per light.
As the PCBs are a little big to accommodate into an ALTO indicator, you can use the OMNI cabin lamp (the small one which is used in the rear)
 
Thread Starter #33
Joined
Aug 12, 2013
Messages
86
Likes
17
Location
MUMBAI
Hi,friends,
My LED lights were slightly bigger in size & it was very difficult to find the console which can hold the LED lights.
Finally as per Shantanu's advise I bought one Omni roof light.Thanks Shantanu bhai.[:D]
I fitted it on the rare side of my cabin.
It gives good light on the back sit & Boot area also.
It can be separately operated by the switch provided on it.
Details will be explained by pics.
 

Attachments

Thread Starter #36
Joined
Aug 12, 2013
Messages
86
Likes
17
Location
MUMBAI
Now I am planning to use these LED lights on rare number plat
By using LEDs instead of bulbs will it drain out my battery soon??[confused]Please guide me.
 
Joined
Mar 28, 2012
Messages
582
Likes
81
Location
Lucknow
Now I am planning to use these LED lights on rare number plat
By using LEDs instead of bulbs will it drain out my battery soon??[confused]Please guide me.
Yes, you can use these LED light on the rear number plate. LED will not drain out battery. As the bulb used is 5W and the LED light that you have made is 2~3W. I had used LEDs for number plate light, but the LEDs need to be focused properly towards the number plate else proper illumination will not be there.
 
Thread Starter #38
Joined
Aug 12, 2013
Messages
86
Likes
17
Location
MUMBAI
Yes, you can use these LED light on the rear number plate. LED will not drain out battery. As the bulb used is 5W and the LED light that you have made is 2~3W. I had used LEDs for number plate light, but the LEDs need to be focused properly towards the number plate else proper illumination will not be there.
Thanks,Shantanu
Yesterday I have sent you one private Message for DIY of Wooden Dashboard.Please reply :please:
 
Thread Starter #39
Joined
Aug 12, 2013
Messages
86
Likes
17
Location
MUMBAI
Hi,Friends
Today I noticed that on of my wiring cable is just hanging (highlighted in the pic)
All the lights,horn & other electric items are working properly.
kindly tell me for what it is ment for? & is it dangerous to keep it like this?
 

Attachments

Joined
May 1, 2011
Messages
3,594
Likes
761
Location
Bangalore
It is for the A/C, it connects to a switch which controls/turns off the compressor when there is no sufficient gas pressure.

I guess you have a retro fitted A/C ..
 
Thread Starter #42
Joined
Aug 12, 2013
Messages
86
Likes
17
Location
MUMBAI
DIY for wooden dashboard & Centre console.

Hi,Friends
Since so many days I was planning to do DIY for Wooden dashboard,
I have started from centre console today as I was not sure enough about the work (so better to start with smaller parts)

What you need
1) Wooden floor paper (Carpet)
2) Synthetic rubber adhesive like Fevicol SR 505.
3) Thin grit sandpaper - for sanding dashboard surface
3) Brush - to apply adhesive
4) Sharp blade & Scissors - for cutting carpet.
5) Isopropyl Alcohol - to remove oil & grease from dashboard surface.

How to proceed
1) Clean the dashboard to remove dirt
2) Clean all surfaces of your dashboard thoroughly with isopropyl alcohol and a clean
towel to facilitate adhesion.Oil, grease and dirt will all keep the adhesive from sticking
properly to the dashboard.
3) You will need to sand (very little sanding) the dashboard with sandpaper.(only the part where you want to apply wooden paper) before you apply gum on surface.
4) Apply thin layers of adhesive on both dashboard and paper and leave it for drying 5 minutes before pasting.(See the instructions on adhesive containor)
5) Paste the paper slowly beginning from one side. (like applying scrath guard on mobile screen) and use a clean cloth to press the paper to dashboard.

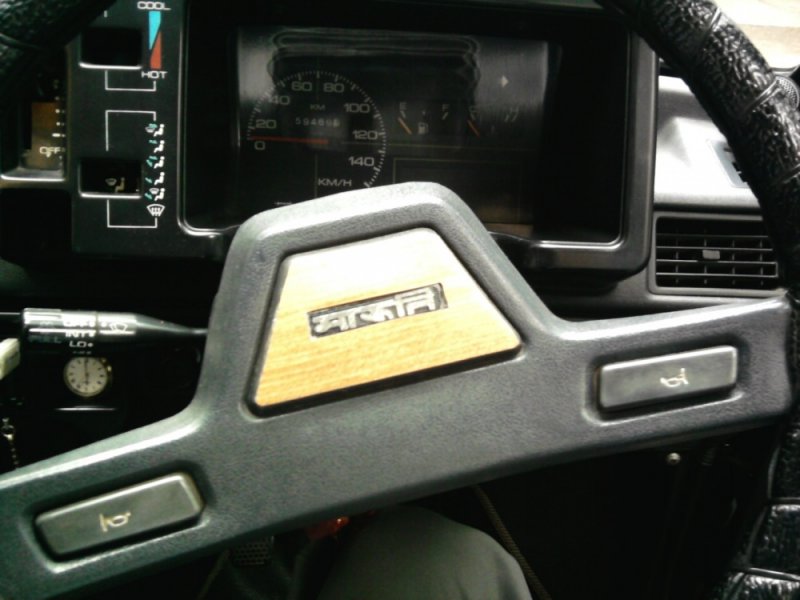
posting few pics (work in progress)
The color difference in two pics is because of cloudy & clear weather
 

Attachments

Last edited:

Top Bottom