
Thread Starter
#1
Improve the Bass Punch of Your Subwoofer by bhvm
Improve the Bass Punch of Your Subwoofer
Everyone loves their bass.
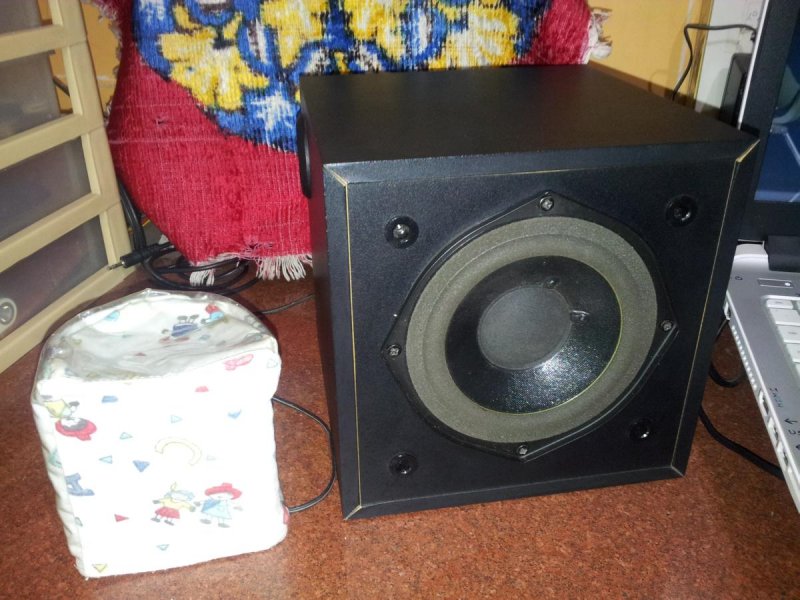
Be it Concrete smashing Beat of the drums or the slow and thoroughly massaging tone of a Pipe organ. And we count on our Subwoofers to deliver it well dressed. My Faithful Bass Companion has been a very small Creative 2.1 system. Its my Secondary system that I use for casual listening- often at night when I don't want to wake the whole neighborhood.
The subwoofer Measures just 7 inches cube. The Bass driver is a tiny weeny 4 inch Woofer with Foam surrounds. Cute and sounds great too! One small dislike I had with this system is somewhat boomy note (Around 60~80~100Hz) that is characteristic of small ported woofers.
The system completes 13 years of service, so I thought about giving it a small birthday gift!
I see that creative has used a Cube design, Not good for reflections. And the Innards are hard & Bare MDF sheets, which are known for ringing and booming at some bass notes. And I have some Ideas...
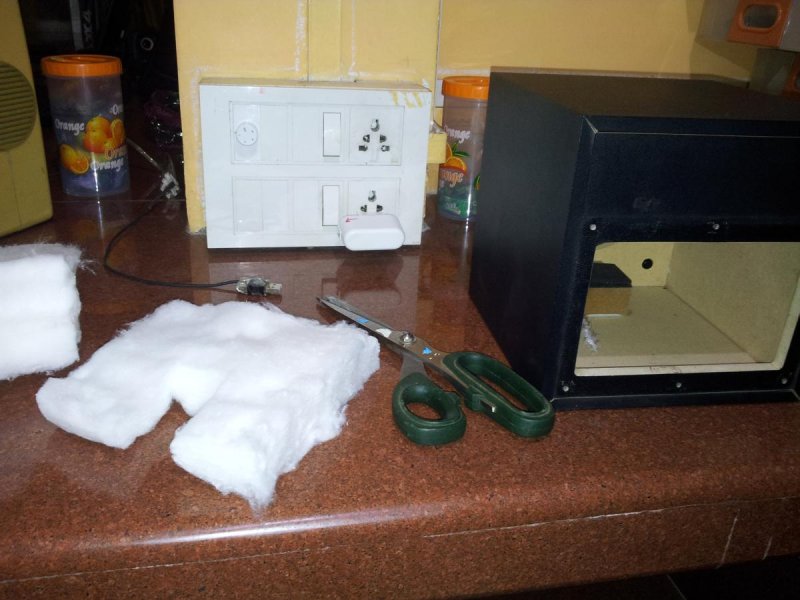
Step 1: Materials Required
Materials Required
1. Tools to open the subwoofer enclosure like screw driver etc.
2. A bag of Poly fill (Pillow stuffing) or cotton rolls
3. Acoustic foam
4. Adequate sized aluminum heatsinks.
5. Thermal paste
6. Hot glue gun, Super glue
7. Cotton gauze or thin cotton cloth (Wound dressing material is best)
8. Service manual for woofer will help immensely if available.
Time required- 1 Hr.
Difficulty- Easy to Moderate.
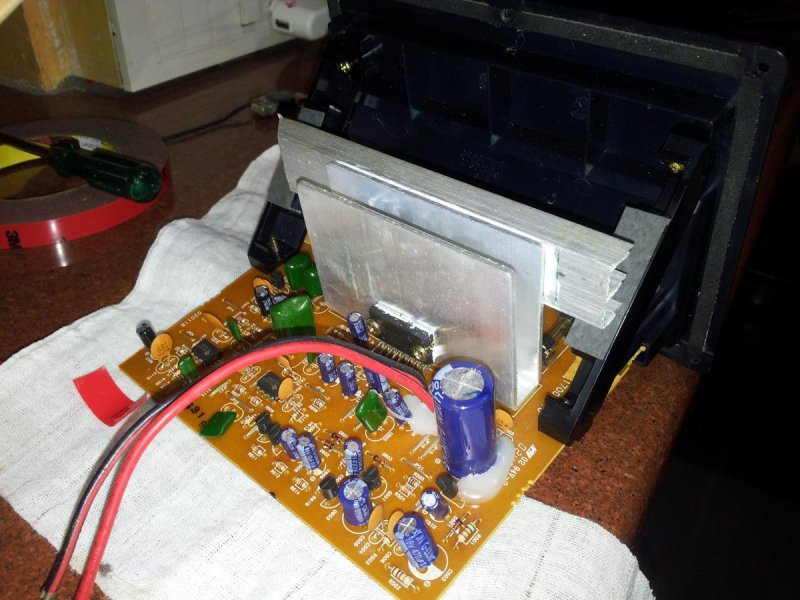
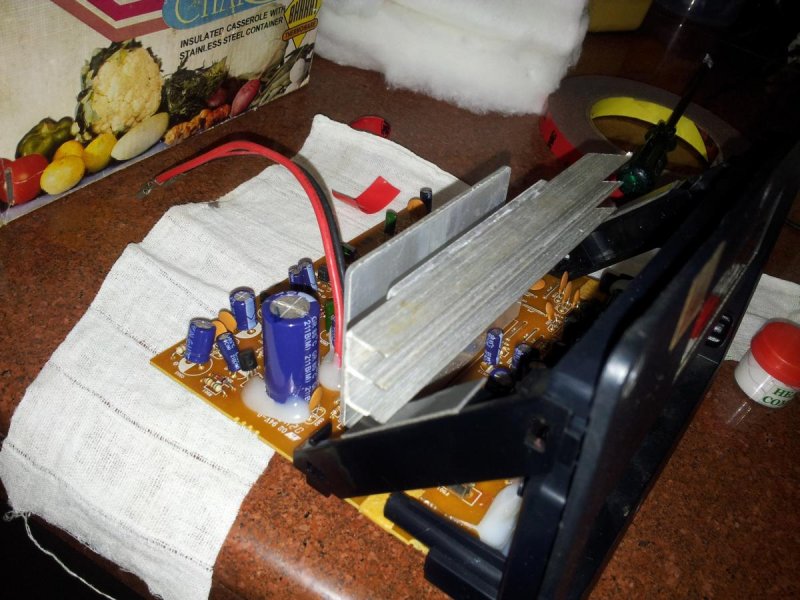
Step 2: Beefing Up Heatsinks
Beefing Up Heatsinks
Heat is the enemy of Electronics.
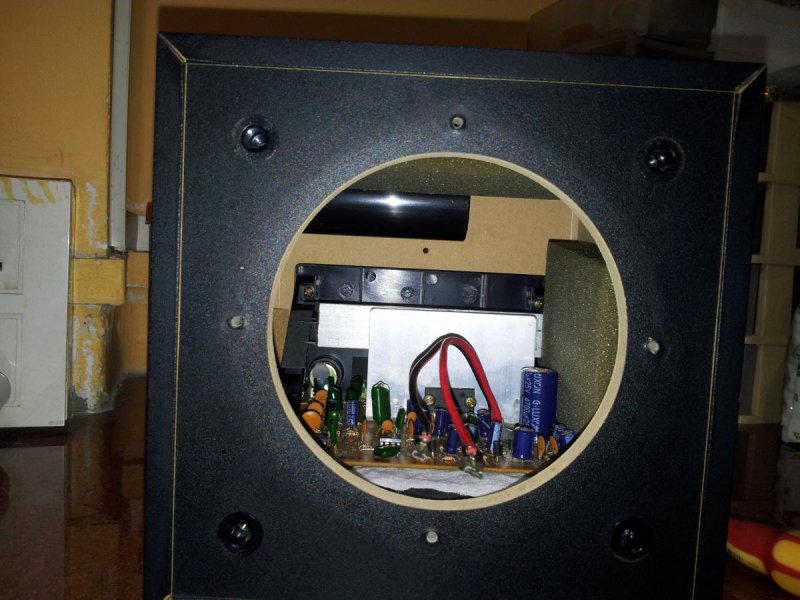
You see, these small Creative woofers come with Amps inbuilt.
Creative had provided a small "U"shaped heatsink on Philips IC which worked well over a decade. But I feel that beefing up heatsinks will help immensely as I plan to use the system more.
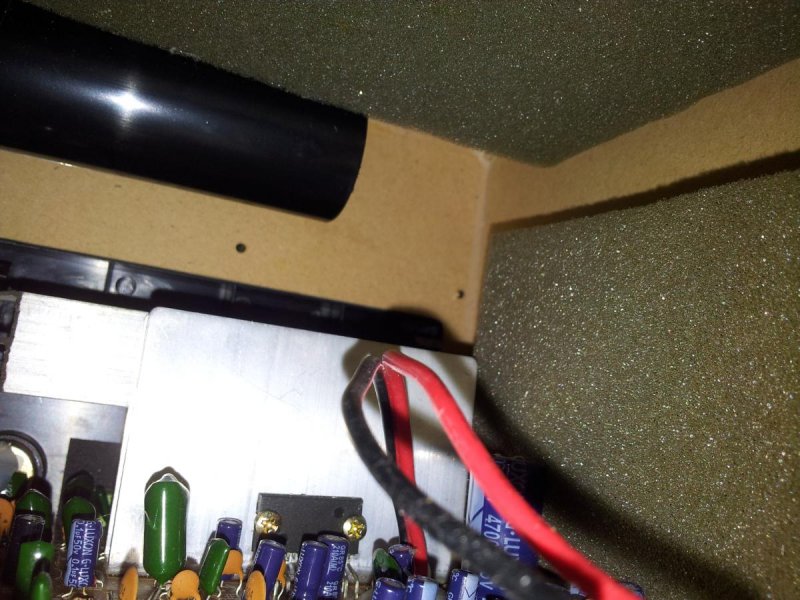
Check the dimensions and free space inside on how big a heatsink you can fit. I brought a piece from scrap aluminum dealer who gave it away free. Then I applied thin layer of Heatsink compound on contact surfaces, added a few drops of super glue (Fevi quick) and pressed them together. Simple and perfect.
The heatsink I have choosen is Quite wide and should offer roughly double the surface area of stock heatsink. Its also aligned with the Bass port, so passing Breeze will also help cool it like a fan.
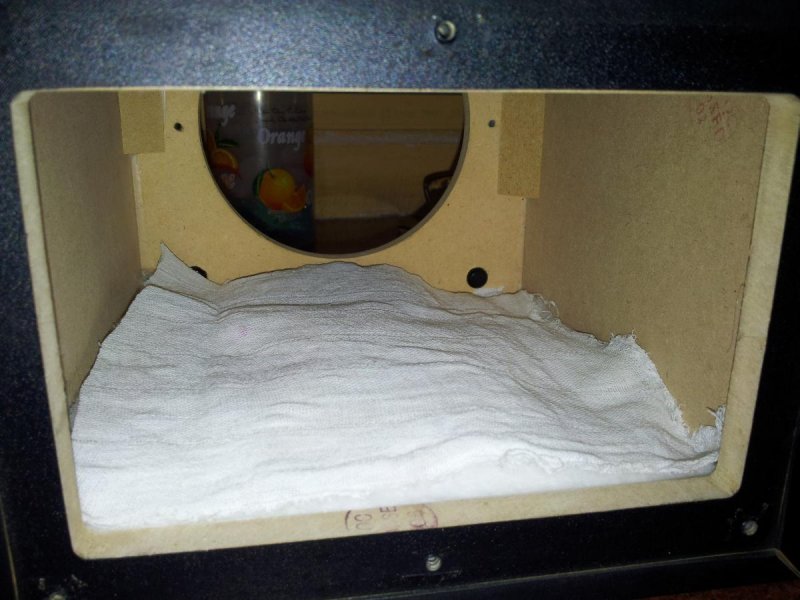
Step 3: Something Fluffy and Something Nice.
Something Fluffy and Something Nice.
Next Step is to add Poly fill inside the enclosure. Idea is that this fluffy stuff slows the waves and makes the box appear as larger. This helps with deeper bass extension.
There is no rule of thumb. Try an Inch thick layer on the bottom for a start. Then add A piece of cotton gauze on top as this is a ported enclosure. Otherwise the Fibres could eject out from the port. I did not require glue as the part of circuit board held the Fiber nicely in place, but you may want to glue it down.
Step 4: Reflections Are Your Enemy- Lining Up the Walls
Reflections Are Your Enemy- Lining Up the Walls
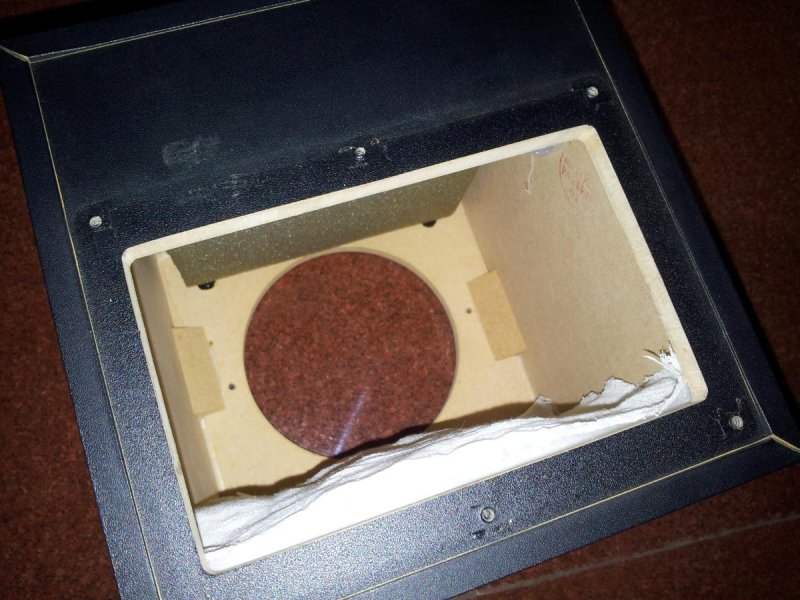
Creative made a very cute style statement with a cubical 7 Inch enclosure. But Experts will tell you, Cube is one of the worst designs due to parallel surfaces and Internal reflections. Also, The MDF was bare and glossy, giving a very boomy effect with peaks noticeable at 80~100 Hz.
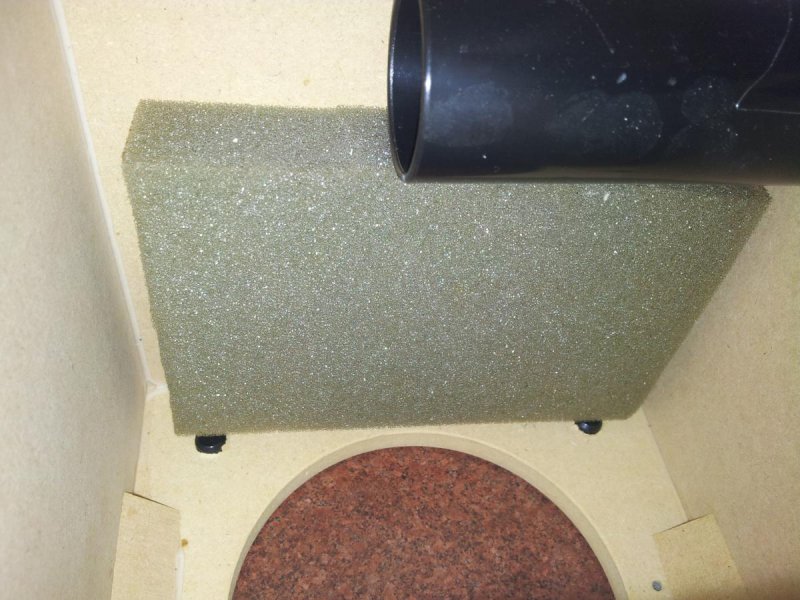
We will be using a layer of acoustic foam. This foam absorbs reflections and cuts on standing waves. Giving a flatter bass response and reduced distortion. Due to space limitations, I could do only 2 sides. If your box is larger, try doing all sides. Hot glue works well for this purpose.
Step 5: Blast Some Bass
Blast Some Bass
Fire up some of your favorite tunes and sit back.
But all is not Done!. The amount of Poly fill can be varied to "Tune" the bass response to your liking. So take your time to fine tune it. Here are are some Improvements/Changes I noticed before and after the mod-
1. Boomy Bass has gone down. The bass notes are now a nice THUMP rather than a woof or doof. I am utterly pleased to have the tight, Hard hitting bass compared to loose flabbing and Boomy bass of earlier.
2. Peaky resonances have cut off.
3. The subwoofer has a more low, Growling tone. The sub also mixes well with the soundstage. Locating the sub by ear is now more difficult. Lower octaves are now more pronounced and distortion free.
4. Deeper notes do no cause the driver to bottom out as easily
5. Any vocals coming from the woofer are absent!
6. The Woofer level control is now useable till 3/4th rather than 1/2 as earlier. The woofer does not flab around uncontrollably at 3/4 compared to before.
7. About 10% of volume has reduced. Something that can be easily set using EQ or Woofer level dial.
8. The woofer is now more enjoyable for a wider level of music Generes. Classical, Instrumentals which used to sound crappy earlier are now more pleasant.
This instructable illustrates a small PC woofer. However the same procedure can be applied to any Home or Car subwoofer. And Oh yes! Please do comment on what Improvements you noticed in your fav bass!
Improve the Bass Punch of Your Subwoofer
Everyone loves their bass.
Be it Concrete smashing Beat of the drums or the slow and thoroughly massaging tone of a Pipe organ. And we count on our Subwoofers to deliver it well dressed. My Faithful Bass Companion has been a very small Creative 2.1 system. Its my Secondary system that I use for casual listening- often at night when I don't want to wake the whole neighborhood.
The subwoofer Measures just 7 inches cube. The Bass driver is a tiny weeny 4 inch Woofer with Foam surrounds. Cute and sounds great too! One small dislike I had with this system is somewhat boomy note (Around 60~80~100Hz) that is characteristic of small ported woofers.
The system completes 13 years of service, so I thought about giving it a small birthday gift!
I see that creative has used a Cube design, Not good for reflections. And the Innards are hard & Bare MDF sheets, which are known for ringing and booming at some bass notes. And I have some Ideas...
Step 1: Materials Required
Materials Required
1. Tools to open the subwoofer enclosure like screw driver etc.
2. A bag of Poly fill (Pillow stuffing) or cotton rolls
3. Acoustic foam
4. Adequate sized aluminum heatsinks.
5. Thermal paste
6. Hot glue gun, Super glue
7. Cotton gauze or thin cotton cloth (Wound dressing material is best)
8. Service manual for woofer will help immensely if available.
Time required- 1 Hr.
Difficulty- Easy to Moderate.
Step 2: Beefing Up Heatsinks
Beefing Up Heatsinks
Heat is the enemy of Electronics.
You see, these small Creative woofers come with Amps inbuilt.
Creative had provided a small "U"shaped heatsink on Philips IC which worked well over a decade. But I feel that beefing up heatsinks will help immensely as I plan to use the system more.
Check the dimensions and free space inside on how big a heatsink you can fit. I brought a piece from scrap aluminum dealer who gave it away free. Then I applied thin layer of Heatsink compound on contact surfaces, added a few drops of super glue (Fevi quick) and pressed them together. Simple and perfect.
The heatsink I have choosen is Quite wide and should offer roughly double the surface area of stock heatsink. Its also aligned with the Bass port, so passing Breeze will also help cool it like a fan.
Step 3: Something Fluffy and Something Nice.
Something Fluffy and Something Nice.
Next Step is to add Poly fill inside the enclosure. Idea is that this fluffy stuff slows the waves and makes the box appear as larger. This helps with deeper bass extension.
There is no rule of thumb. Try an Inch thick layer on the bottom for a start. Then add A piece of cotton gauze on top as this is a ported enclosure. Otherwise the Fibres could eject out from the port. I did not require glue as the part of circuit board held the Fiber nicely in place, but you may want to glue it down.
Step 4: Reflections Are Your Enemy- Lining Up the Walls
Reflections Are Your Enemy- Lining Up the Walls
Creative made a very cute style statement with a cubical 7 Inch enclosure. But Experts will tell you, Cube is one of the worst designs due to parallel surfaces and Internal reflections. Also, The MDF was bare and glossy, giving a very boomy effect with peaks noticeable at 80~100 Hz.
We will be using a layer of acoustic foam. This foam absorbs reflections and cuts on standing waves. Giving a flatter bass response and reduced distortion. Due to space limitations, I could do only 2 sides. If your box is larger, try doing all sides. Hot glue works well for this purpose.
Step 5: Blast Some Bass
Blast Some Bass
Fire up some of your favorite tunes and sit back.
But all is not Done!. The amount of Poly fill can be varied to "Tune" the bass response to your liking. So take your time to fine tune it. Here are are some Improvements/Changes I noticed before and after the mod-
1. Boomy Bass has gone down. The bass notes are now a nice THUMP rather than a woof or doof. I am utterly pleased to have the tight, Hard hitting bass compared to loose flabbing and Boomy bass of earlier.
2. Peaky resonances have cut off.
3. The subwoofer has a more low, Growling tone. The sub also mixes well with the soundstage. Locating the sub by ear is now more difficult. Lower octaves are now more pronounced and distortion free.
4. Deeper notes do no cause the driver to bottom out as easily
5. Any vocals coming from the woofer are absent!
6. The Woofer level control is now useable till 3/4th rather than 1/2 as earlier. The woofer does not flab around uncontrollably at 3/4 compared to before.
7. About 10% of volume has reduced. Something that can be easily set using EQ or Woofer level dial.
8. The woofer is now more enjoyable for a wider level of music Generes. Classical, Instrumentals which used to sound crappy earlier are now more pleasant.
This instructable illustrates a small PC woofer. However the same procedure can be applied to any Home or Car subwoofer. And Oh yes! Please do comment on what Improvements you noticed in your fav bass!
Attachments
-
918.7 KB Views: 180


![[:)]](https://www.theautomotiveindia.com/forums/images/smilies/Smile.gif "Smile [:)]") . Good Effort there! I would suggest you to place a grill in front of the speaker so as to avoid any damage to it like any liquid spill over et al.
. Good Effort there! I would suggest you to place a grill in front of the speaker so as to avoid any damage to it like any liquid spill over et al.