Thread Starter
#1
Dear friends,
My car is Fiat Palio 1.2 nv Petrol - 2004 dec.Model.
For last TWO times, I have observed that the petrol is dripping (in substantial quantity) while filling the petrol at petrol pump. It gets poured on the floor. Some quantity is coming out and then onward there is no issue. I suspect that either Filler Hose is cracked/loosen or some other pipes-connection might be the culprit.
I herewith put forward the efforts I made.
(1)
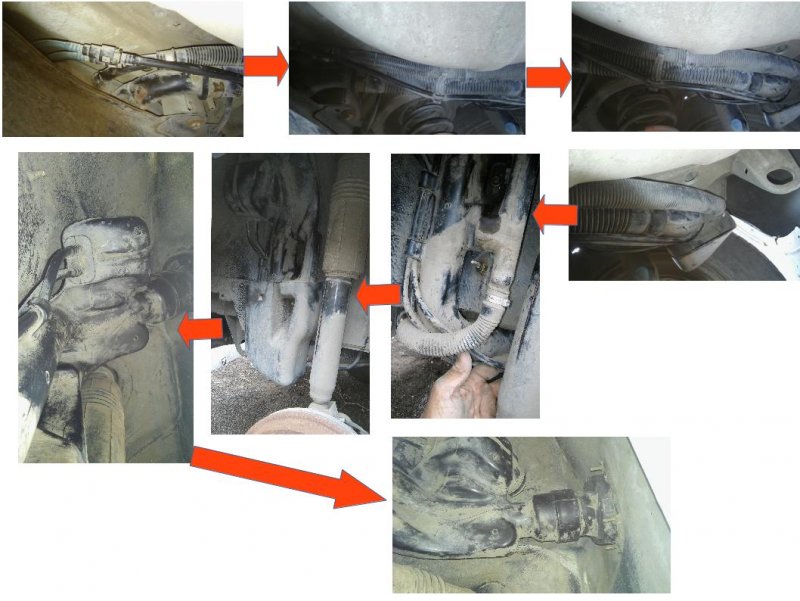
I removed the rear wheel and jacked up the car. From underneath the car, I observed very minutely for the places/locations from where the fuel (petrol/gasoline) may come out. Looked in detail about the symptoms for some fuel patches or dampness etc. Then also cleaned all pipes and lines and surfaces. Also removed a bottom cover on the fuel filler pipe/hose assembly and cleaned the surfaces. Nowhere fuel leakage symptoms were found. The concerned video is uploaded on Youtube (https://www.youtube.com/watch?v=0V8EIK0CYpQ) under title “Fiat Palio Filler Hose to Tank pipings” and also adding pics titled as 1-Checking of all the pipings
(2)
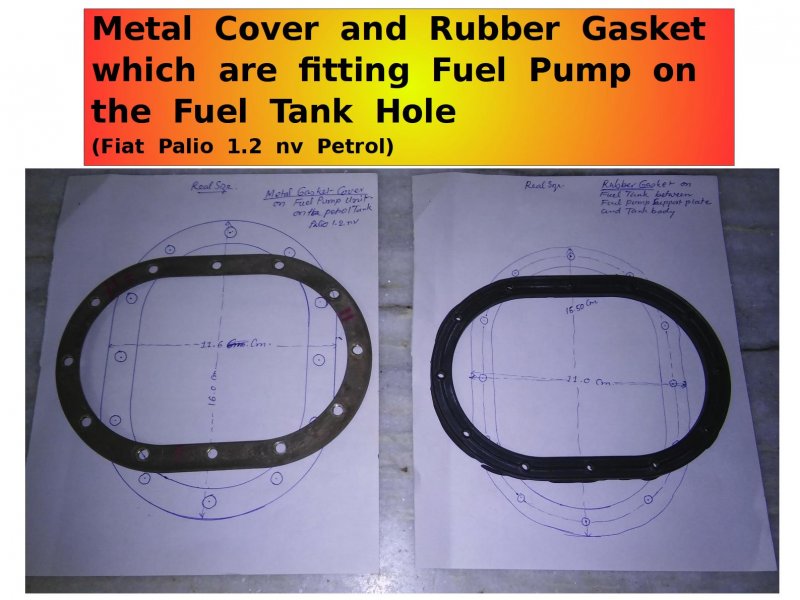
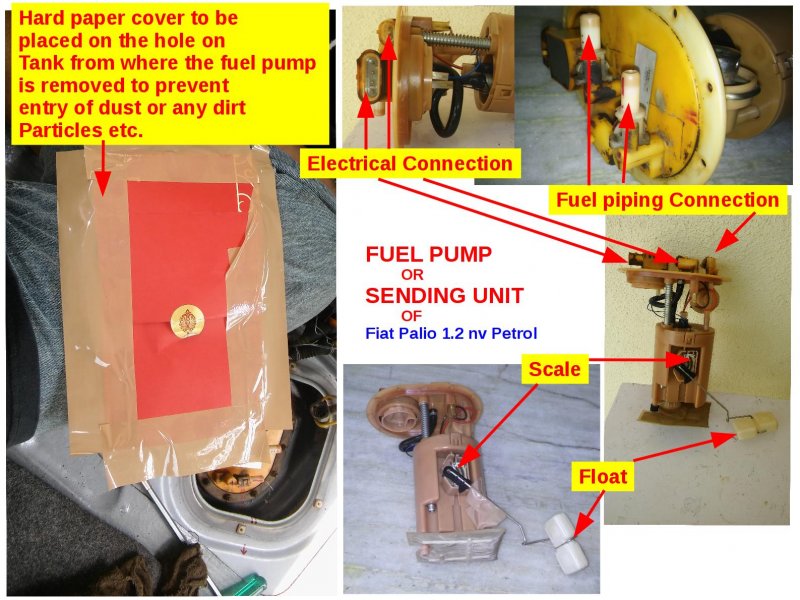
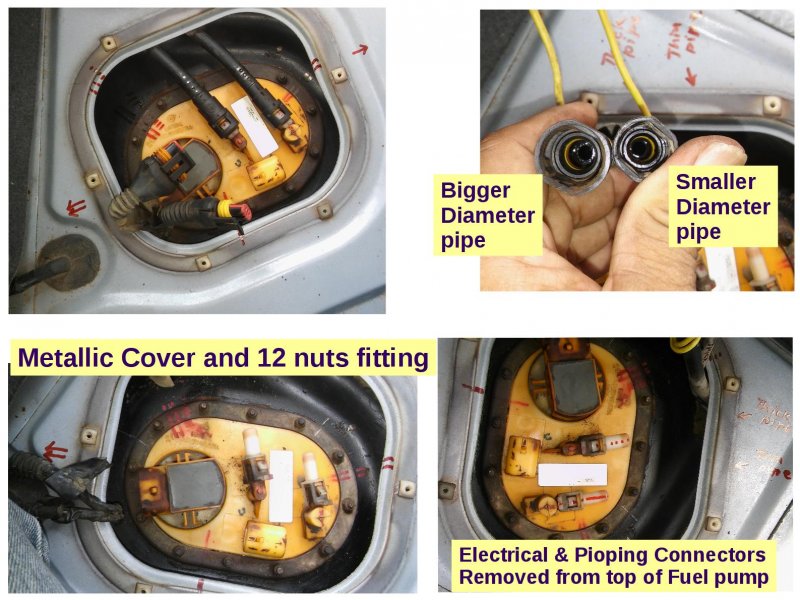
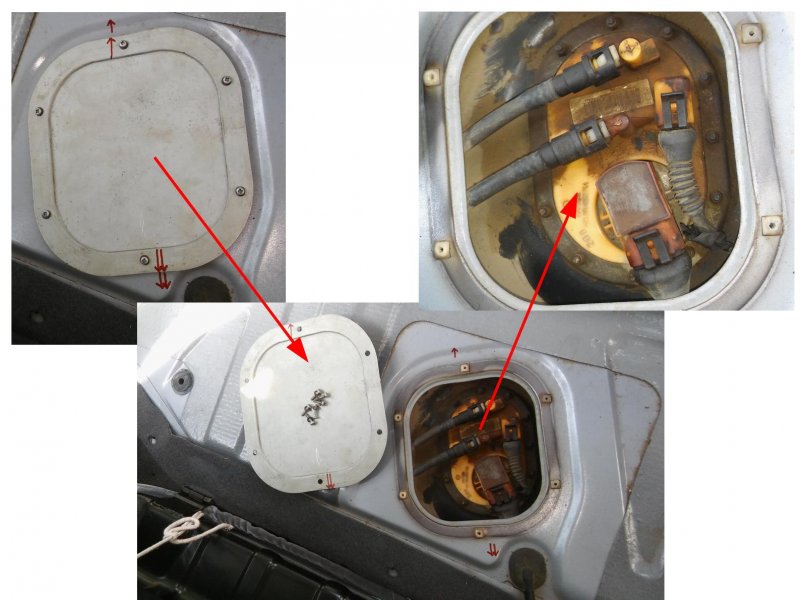
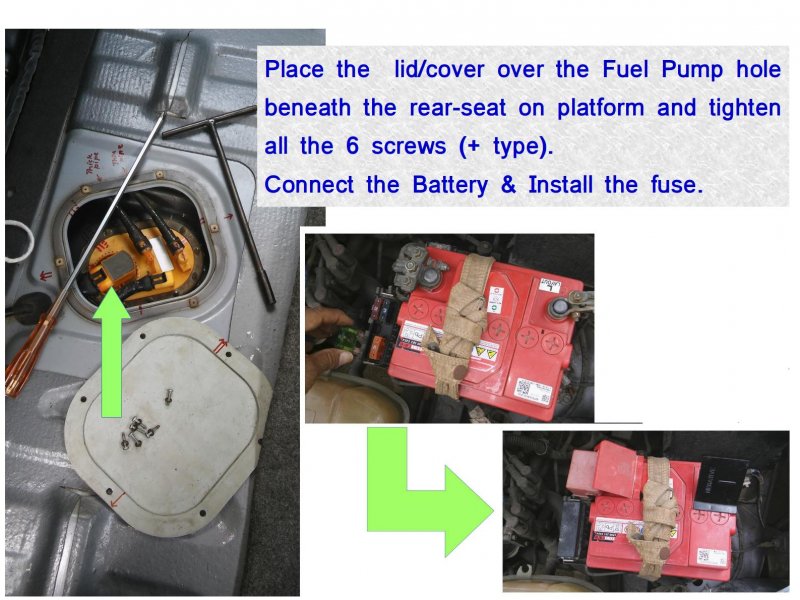
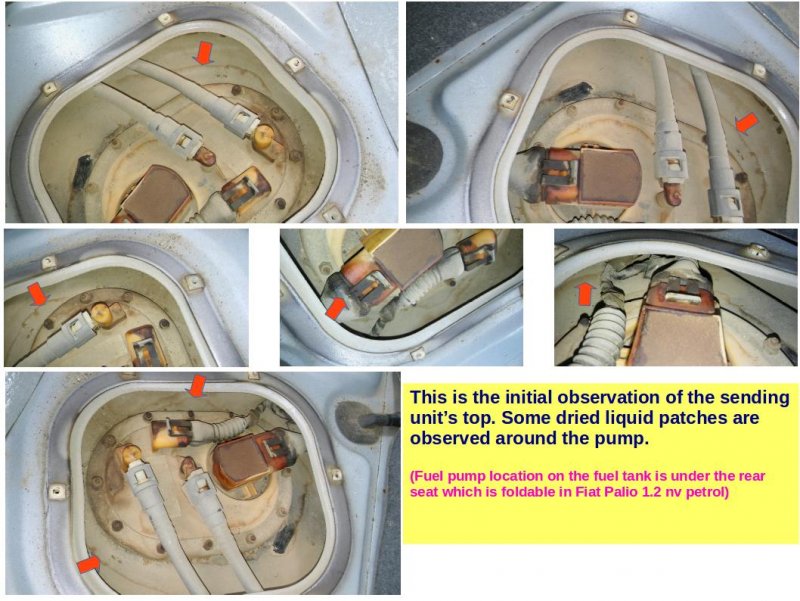
Then I opened the connection assembly of fuel pump which is located under the rear seat. Folded the rear seat and opened a lid having 6 screws. Around the upper fiber surface of the sending unit (fuel pump) some patches of liquid spreadings were found. Though it was not wet ! I am adding pics titled as 2-Initial Observation around Fuel pump
(3)
I also poured couple of liters of petrol to filler pipe/hose through fuel filling bunk with some expectation to find leakage somewhere. But nothing happened. The fuel went into the fuel tank.
(4)
In order to conclusively establish the location of the leakage, I am left with no option but to physically observe all the suspected leakage areas while filling the petrol in the tank to the full at a petrol pump / gas station.
Obviously the prime areas under observation were
(a) Underneath the rear part of the car
(b) Sending unit’s upper surface (on the fuel tank under the rear seat).
Naturally an assistant was essential to take sharp observation with a camera. Single person can not focus simultaneously to all around while filling petrol. Finally I did it.
(5)
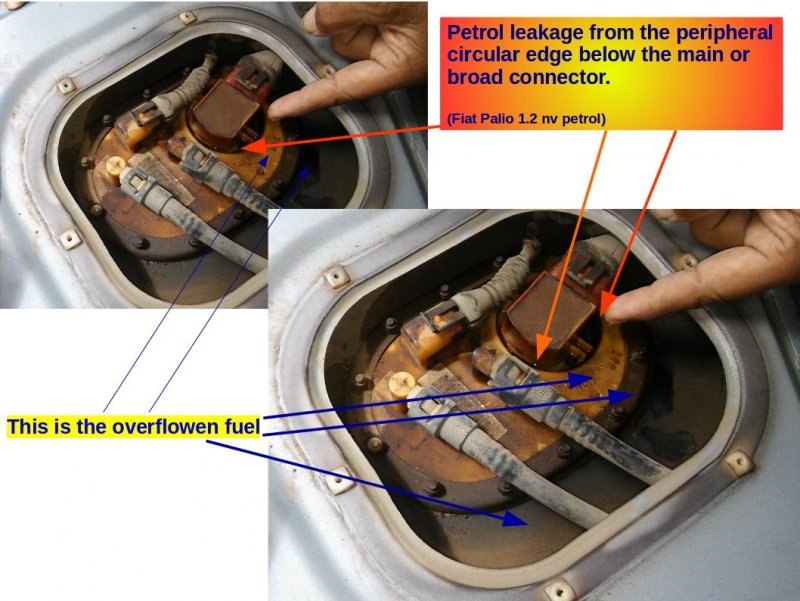
Resultantly, as the tank became full, the petrol overflowing observed. The excess fuel was found coming out profusely from the fuel pump’s / sending unit’s connection’s round part.
The video is uploaded on youtube (https://www.youtube.com/watch?v=bZUjdTrAt-M) under title “Fiat Palio Fuel Tank Leakage found”. I am adding the pics titled as 3-Fuel leakage location on sending unit.
(I cherished this moment despite fuel wastage ! ! ! …).
So ultimately the leaking location could be identified. Now, I need your advise and guidance for the following:
(a). Is this issue repairable? How?
(b). Should this culprit require the replacement of the whole fuel pump? If this is the essential solution, then it may dig a big hole in my pocket!
Please GUIDE and oblige.
Navin Talati / 21-08-2016
My car is Fiat Palio 1.2 nv Petrol - 2004 dec.Model.
For last TWO times, I have observed that the petrol is dripping (in substantial quantity) while filling the petrol at petrol pump. It gets poured on the floor. Some quantity is coming out and then onward there is no issue. I suspect that either Filler Hose is cracked/loosen or some other pipes-connection might be the culprit.
I herewith put forward the efforts I made.
(1)
I removed the rear wheel and jacked up the car. From underneath the car, I observed very minutely for the places/locations from where the fuel (petrol/gasoline) may come out. Looked in detail about the symptoms for some fuel patches or dampness etc. Then also cleaned all pipes and lines and surfaces. Also removed a bottom cover on the fuel filler pipe/hose assembly and cleaned the surfaces. Nowhere fuel leakage symptoms were found. The concerned video is uploaded on Youtube (https://www.youtube.com/watch?v=0V8EIK0CYpQ) under title “Fiat Palio Filler Hose to Tank pipings” and also adding pics titled as 1-Checking of all the pipings
(2)
Then I opened the connection assembly of fuel pump which is located under the rear seat. Folded the rear seat and opened a lid having 6 screws. Around the upper fiber surface of the sending unit (fuel pump) some patches of liquid spreadings were found. Though it was not wet ! I am adding pics titled as 2-Initial Observation around Fuel pump
(3)
I also poured couple of liters of petrol to filler pipe/hose through fuel filling bunk with some expectation to find leakage somewhere. But nothing happened. The fuel went into the fuel tank.
(4)
In order to conclusively establish the location of the leakage, I am left with no option but to physically observe all the suspected leakage areas while filling the petrol in the tank to the full at a petrol pump / gas station.
Obviously the prime areas under observation were
(a) Underneath the rear part of the car
(b) Sending unit’s upper surface (on the fuel tank under the rear seat).
Naturally an assistant was essential to take sharp observation with a camera. Single person can not focus simultaneously to all around while filling petrol. Finally I did it.
(5)
Resultantly, as the tank became full, the petrol overflowing observed. The excess fuel was found coming out profusely from the fuel pump’s / sending unit’s connection’s round part.
The video is uploaded on youtube (https://www.youtube.com/watch?v=bZUjdTrAt-M) under title “Fiat Palio Fuel Tank Leakage found”. I am adding the pics titled as 3-Fuel leakage location on sending unit.
(I cherished this moment despite fuel wastage ! ! ! …).
So ultimately the leaking location could be identified. Now, I need your advise and guidance for the following:
(a). Is this issue repairable? How?
(b). Should this culprit require the replacement of the whole fuel pump? If this is the essential solution, then it may dig a big hole in my pocket!
Please GUIDE and oblige.
Navin Talati / 21-08-2016
Attachments
-
 107.9 KB Views: 207
 -
 134.1 KB Views: 410
 -
 116.2 KB Views: 526