
Thread Starter
#1
When it comes to 4 wheels, every person tries to maximize the comfort. Finding ways of getting comfortable on a drive so that the concentration and driving experience is better. The premium segment cars just cocoon the passenger and give the ultimate comfort be it in any seat in the car. I too wanted to add as much as features to my car that make every day driving comfortable and easy on myself. I travel 110 kms on an average a day so I spend around 2-3 hours on the road in my car so comfort is one important parameter for me.
With me spending so much time behind the wheel every day, I did feel the need for an Armrest where my left hand used to be resting on my thighs or holding the gear lever like a taxi driver.![[:D]](https://www.theautomotiveindia.com/forums/images/smilies/Big%20Smile.gif "Big Smile [:D]")
I started searching for the armrest choices and I did want to go the D.I.Y route rather than taking my car to an accessory installer.
Recap to 28.08.2014:
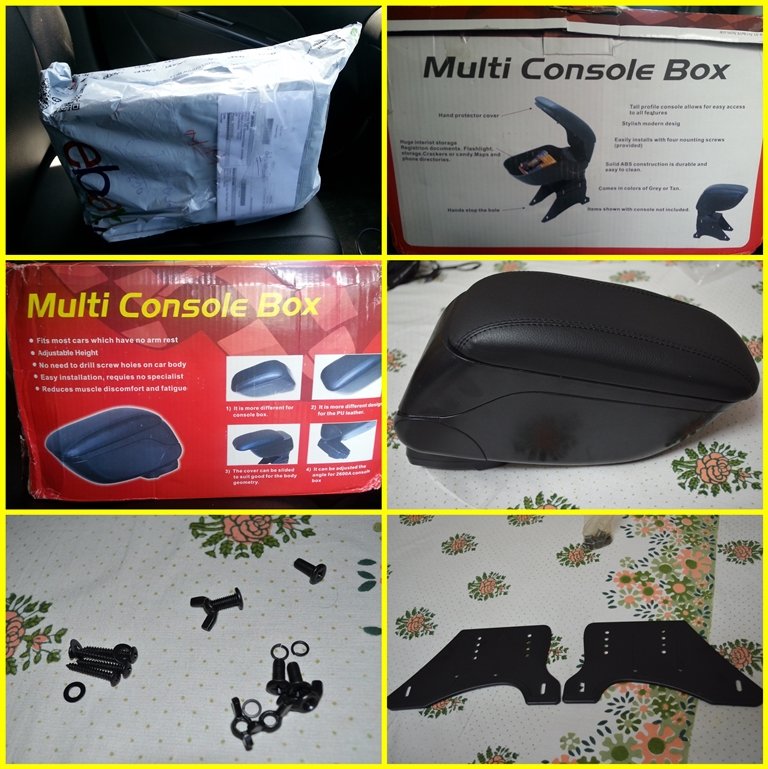
The search for Armrests started and I found EBay was the place where the most choices were floating around so went and got one Universal Armrest for Swift in black colour. Got the package delivered home within 3 days from shipping.
Costs incurred:
Armrest: ₹900
Shipping: Free!
Total: ₹900
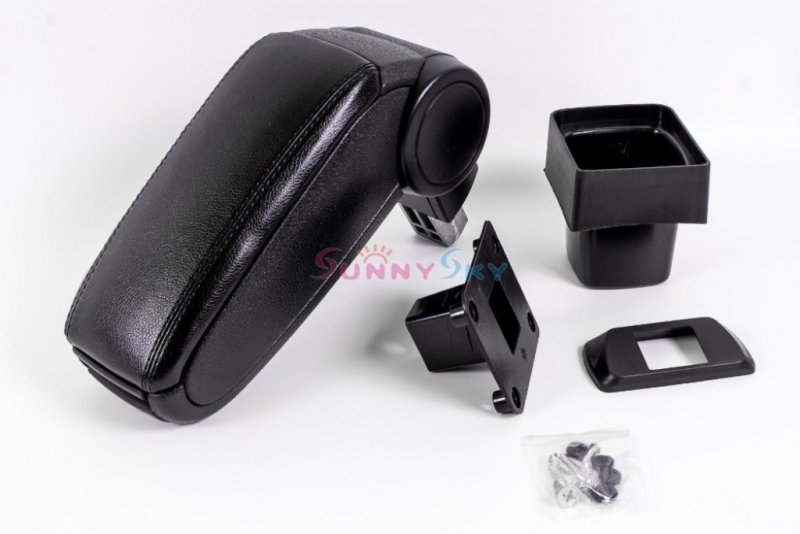
Package Contents:
Got down to assembling the armrest after unboxing it:
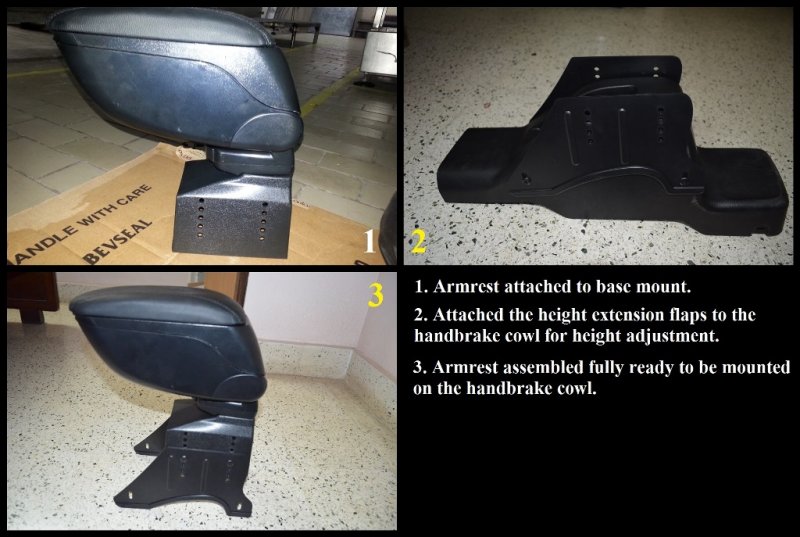
Step – 1: Assemble the Armrest on trial basis and place it on the plastic cladding over the handbrake console to get an idea of the height the armrest to be positioned at. This will also give the exact point required for drilling the holes on the handbrake console.
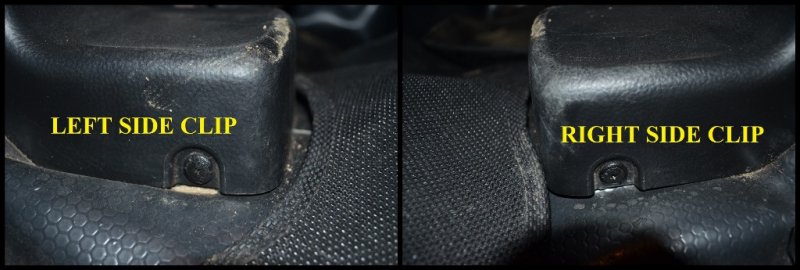
Step – 2: Open the handbrake console by removing the plastic clips at the rear end (behind the handbrake cowl at the base) and then free the clips at the front by lifting the console freeing it completely. Keep the car in 1st gear so that the console comes out free for proceeding further.
Step – 3: Drill 4 holes in total (2 on each side) for fixing the base plates or height adjusting flaps on which the base bracket will be fixed.
Step – 4 (Optional): Cover the base mount and the height adjustable flaps with the mat that is used as carpet in our cars for a neat and clean look.
Step – 5: Using good quality nuts and bolts, fix the armrest to the handbrake console. Do NOT over-tighten it as it may crack the plastic.
Step – 6: Fix the handbrake console and check for the height and change if necessary after comfortably seated.
Pictures of the Installation:
Universal Armrest
Handbrake Cowl holder plastic clips
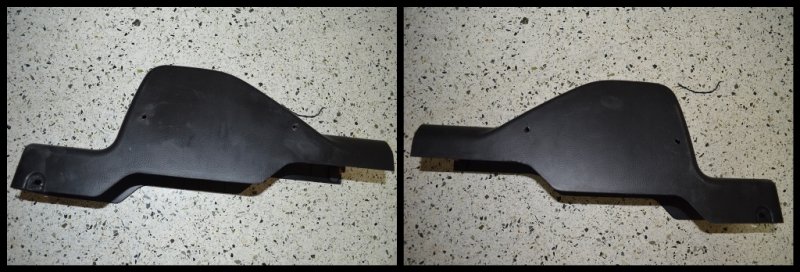
Handbrake console removed

Hole drilled in the handbrake console
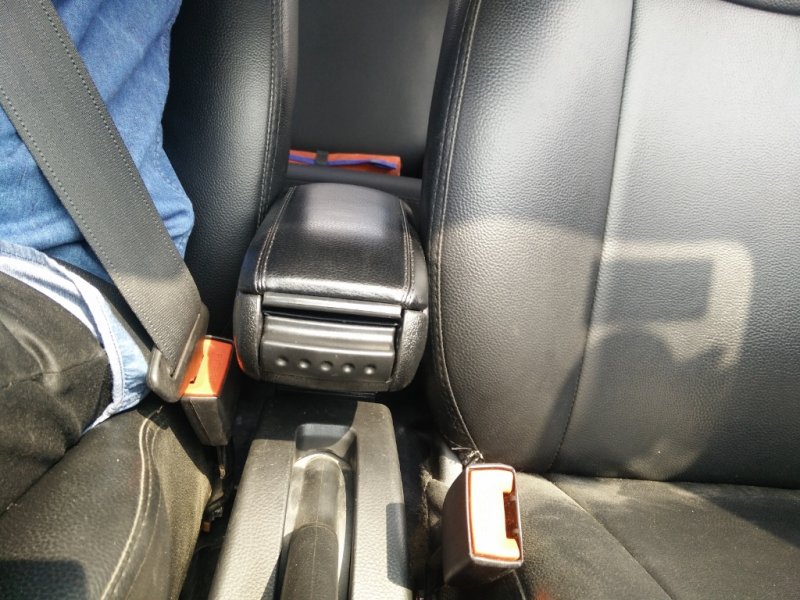
Universal Armrest installed
Armrest installed in position

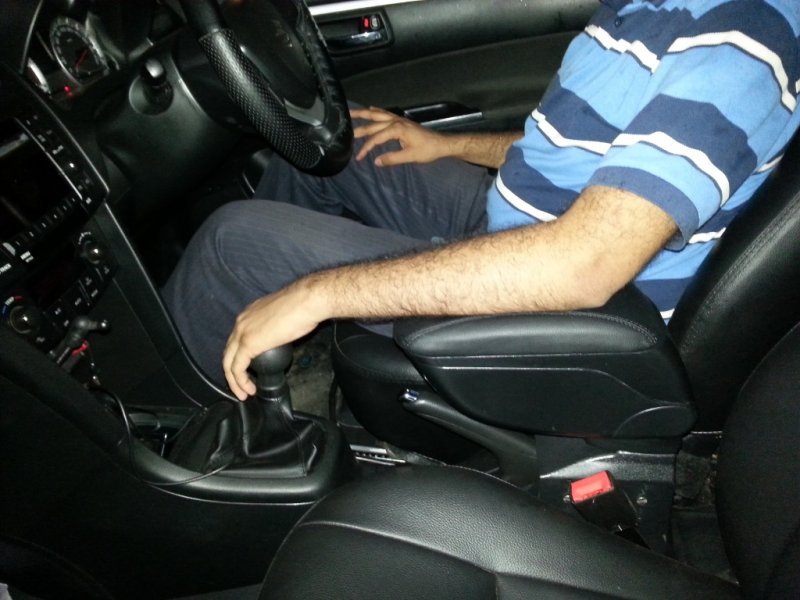
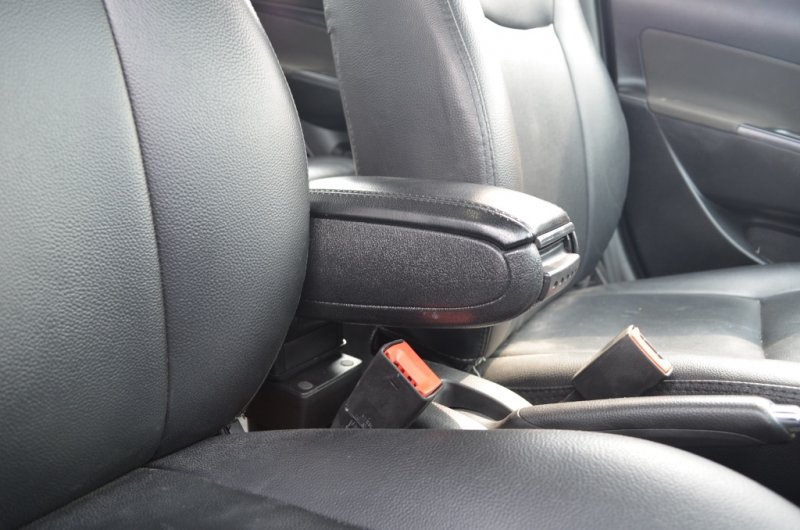
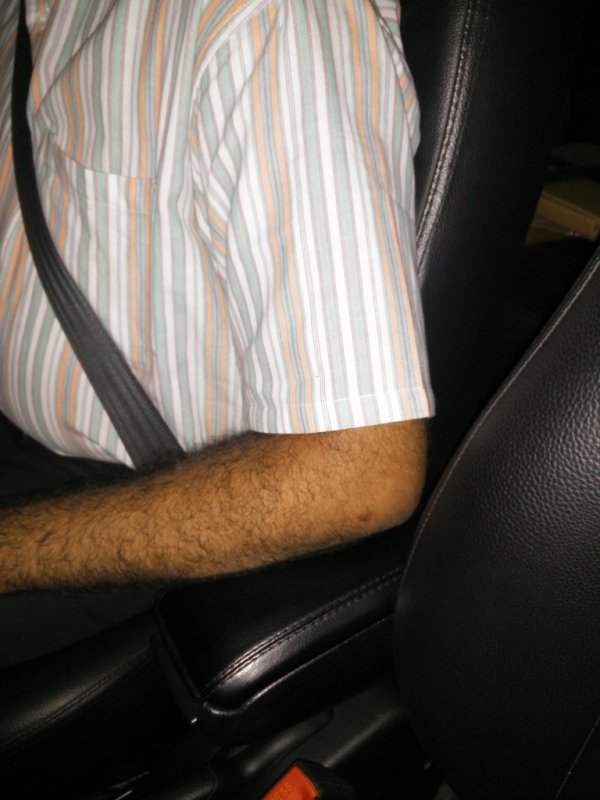
Driver's Comfort
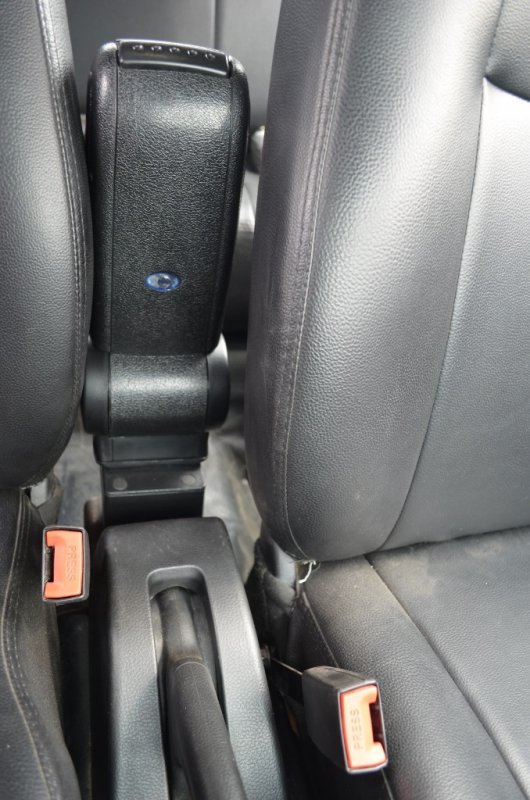
Passenger's Comfort

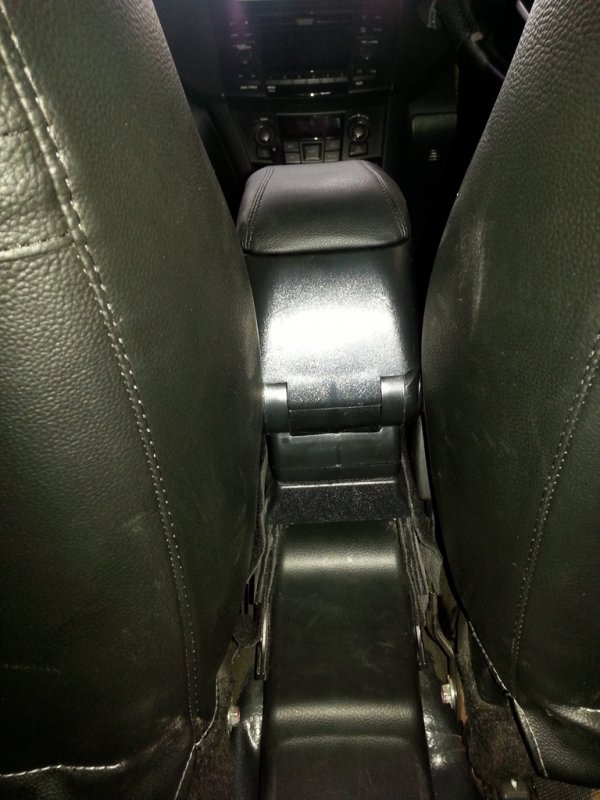
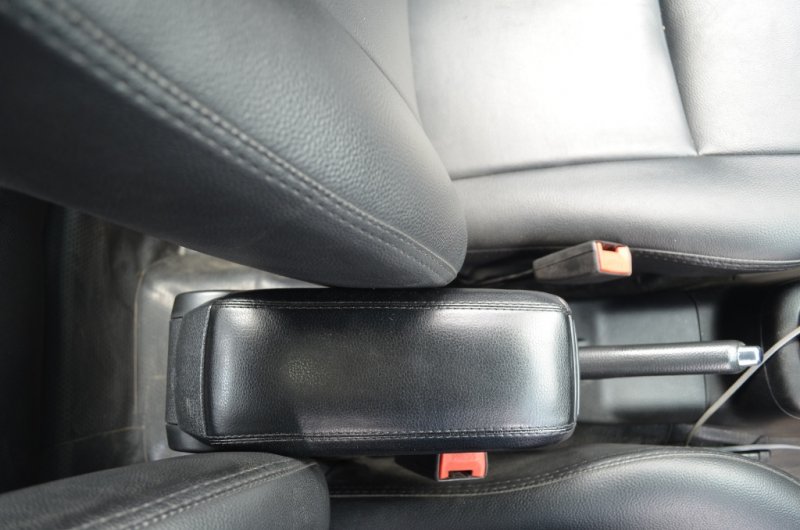
A view from Behind**
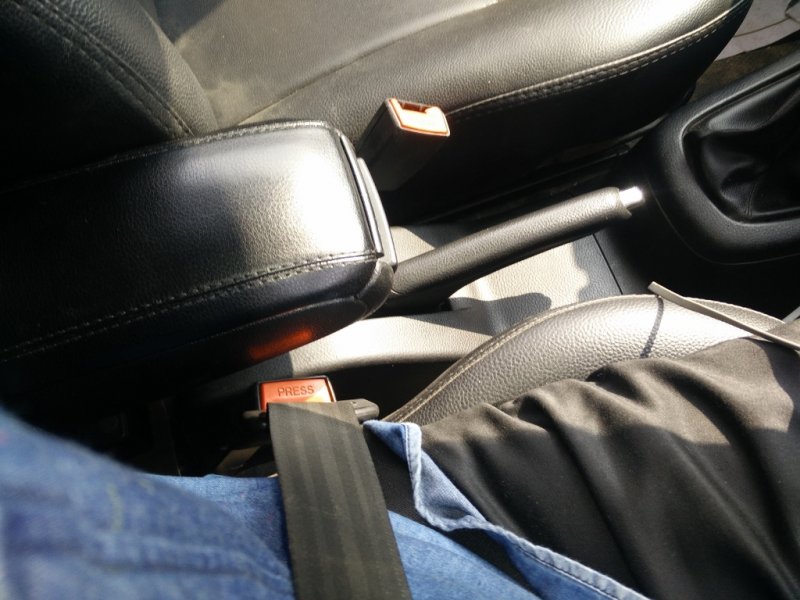
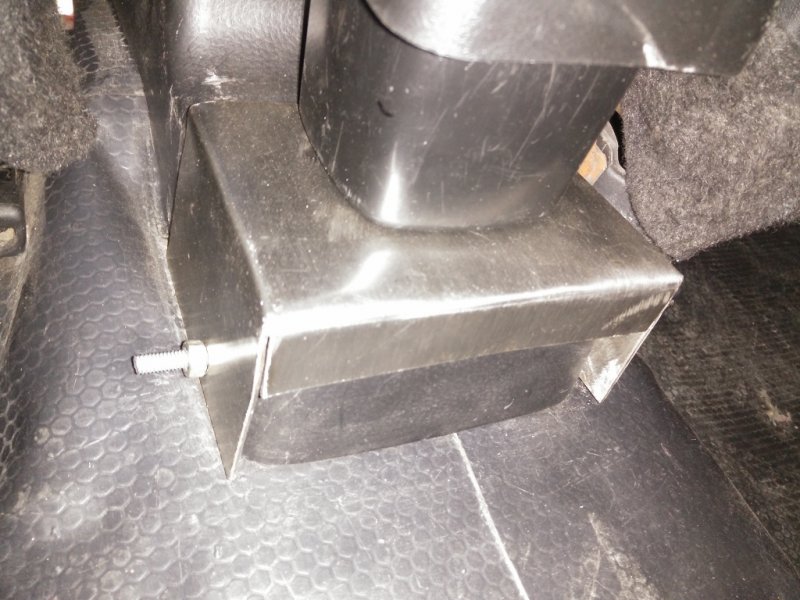
Clearance between the base mount and handbrake when in service position

**No! I am not done here was not a happy guy after this installation and was more felling bad with the armrest and my Swift. Reason, look at the picture with the "**". There is absolutely no gap left for the seats to travel forward and back with shaking and disturbing the console so much that it could snap off the mounts.
There was no other alternative in the market other than these Universal ones and I for one was just NOT going to be using the armrest in such state.
Coming to the hindrances or Issues faced during and after the installation.
Issue 1: Not checking the width between the front seats as mentioned in the description on Ebay – It states that there must be a minimum gap of 14 cms between the seats for efficient and complete installation so to prevent the armrest from rubbing against the seats restricting the movement. I totally missed checking it and blindly bought it. At the step 6, I stumbled when I moved the seat back to normal position to sit and check how it feels during a small drive. The actual gap between the seats in my Swift is around 10.2 – 10.7 cms (~11 cms).
Issue 2: Height of the armrest when installed didn’t allow the handbrake to reach its top-most position so I had to set it a bit higher than I actually wanted.
Issue 3: Once the armrest was fixed, in the interest of saving the armrest and the plastic panels below the passenger was stuck at the farthest position which was creating issues when friends/family climb-in. I was getting tensed every time someone moved the seats to their comfortable position ignoring the armrest.
Irritated with the above 3 issues, I uninstalled the armrest and sold it off to a friend who later fixed it in his car as he is the only one using it all of the time where the Issue 1 was not an hindrance to him.
I got my money back but was dejected that the installation could not go ahead and I dreamt of having one in my car thanks to long journey’s I do every day where my left hand has no place to rest.
From then on I frantically started searching for different models that were below 14 cms in width.
---->Fast Forward to 06.02.2015
Come mid-October and I stumble upon a seller on AliExpress who sells the Swift Armrest for the models ranging from 2005 to 2015. Mine being 2013, I contacted asking whether this will fit my car or not?! I received a response 4 days later (I had lost hope of receiving a reply) saying that it will fit. 5 minutes later I got a mail asking for a picture of the handbrake console area so that they can verify before shipping it to me.
A day after sending him the picture, I got the response that I was not wanting to read at all. The seller told that the handbrake console is different from the Swift that is sold here and from what I drive here in India. I was like . Replied thanks and left it there.
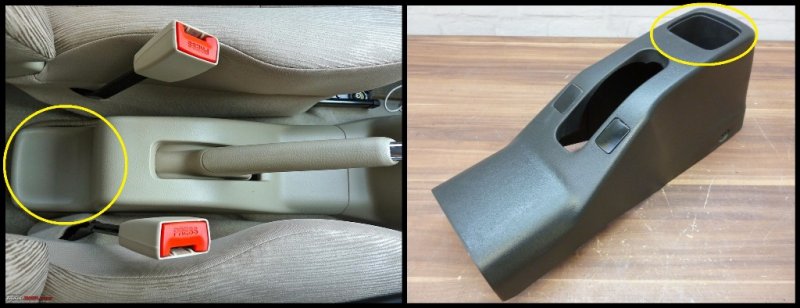
The reason he states that this one will not fit was because the Indian version doesn't get a cup holder that is located behind the handbrake lever which is available in the car sold elsewhere in the world.
Difference in construction between Indian vs UK one
Damn you Maruti engineers! Why this step-motherly treatment to us when you sell and live life of a King because of we Indians?! What kind of money saving tactic is this?!
All the armrest's that are sold are directly bolted or seated into this very cup holder behind so installation is just minutes and D.I.Y. Now for me the cup holder itself was missing so I had to think of some alternative where I can compensate for the missing cup holder.
With all hopes of getting the armrest installed in my car, I let go the thought and continued driving as it is.
BUT, God had other plans.....
With me spending so much time behind the wheel every day, I did feel the need for an Armrest where my left hand used to be resting on my thighs or holding the gear lever like a taxi driver.
I started searching for the armrest choices and I did want to go the D.I.Y route rather than taking my car to an accessory installer.
Recap to 28.08.2014:
The search for Armrests started and I found EBay was the place where the most choices were floating around so went and got one Universal Armrest for Swift in black colour. Got the package delivered home within 3 days from shipping.
Costs incurred:
Armrest: ₹900
Shipping: Free!
Total: ₹900
Package Contents:
- Armrest;
- Base bracket;
- Support stands;
- Screw set.
Got down to assembling the armrest after unboxing it:
Step – 1: Assemble the Armrest on trial basis and place it on the plastic cladding over the handbrake console to get an idea of the height the armrest to be positioned at. This will also give the exact point required for drilling the holes on the handbrake console.
Step – 2: Open the handbrake console by removing the plastic clips at the rear end (behind the handbrake cowl at the base) and then free the clips at the front by lifting the console freeing it completely. Keep the car in 1st gear so that the console comes out free for proceeding further.
Step – 3: Drill 4 holes in total (2 on each side) for fixing the base plates or height adjusting flaps on which the base bracket will be fixed.
Step – 4 (Optional): Cover the base mount and the height adjustable flaps with the mat that is used as carpet in our cars for a neat and clean look.
Step – 5: Using good quality nuts and bolts, fix the armrest to the handbrake console. Do NOT over-tighten it as it may crack the plastic.
Step – 6: Fix the handbrake console and check for the height and change if necessary after comfortably seated.
Pictures of the Installation:
Universal Armrest
Handbrake Cowl holder plastic clips
Handbrake console removed
Hole drilled in the handbrake console
Universal Armrest installed
Armrest installed in position
Driver's Comfort
Passenger's Comfort
A view from Behind**
Clearance between the base mount and handbrake when in service position
**No! I am not done here was not a happy guy after this installation and was more felling bad with the armrest and my Swift. Reason, look at the picture with the "**". There is absolutely no gap left for the seats to travel forward and back with shaking and disturbing the console so much that it could snap off the mounts.
There was no other alternative in the market other than these Universal ones and I for one was just NOT going to be using the armrest in such state.
Coming to the hindrances or Issues faced during and after the installation.
Issue 1: Not checking the width between the front seats as mentioned in the description on Ebay – It states that there must be a minimum gap of 14 cms between the seats for efficient and complete installation so to prevent the armrest from rubbing against the seats restricting the movement. I totally missed checking it and blindly bought it. At the step 6, I stumbled when I moved the seat back to normal position to sit and check how it feels during a small drive. The actual gap between the seats in my Swift is around 10.2 – 10.7 cms (~11 cms).
Issue 2: Height of the armrest when installed didn’t allow the handbrake to reach its top-most position so I had to set it a bit higher than I actually wanted.
Issue 3: Once the armrest was fixed, in the interest of saving the armrest and the plastic panels below the passenger was stuck at the farthest position which was creating issues when friends/family climb-in. I was getting tensed every time someone moved the seats to their comfortable position ignoring the armrest.
Irritated with the above 3 issues, I uninstalled the armrest and sold it off to a friend who later fixed it in his car as he is the only one using it all of the time where the Issue 1 was not an hindrance to him.
I got my money back but was dejected that the installation could not go ahead and I dreamt of having one in my car thanks to long journey’s I do every day where my left hand has no place to rest.
From then on I frantically started searching for different models that were below 14 cms in width.
---->Fast Forward to 06.02.2015
Come mid-October and I stumble upon a seller on AliExpress who sells the Swift Armrest for the models ranging from 2005 to 2015. Mine being 2013, I contacted asking whether this will fit my car or not?! I received a response 4 days later (I had lost hope of receiving a reply) saying that it will fit. 5 minutes later I got a mail asking for a picture of the handbrake console area so that they can verify before shipping it to me.
A day after sending him the picture, I got the response that I was not wanting to read at all. The seller told that the handbrake console is different from the Swift that is sold here and from what I drive here in India. I was like . Replied thanks and left it there.
The reason he states that this one will not fit was because the Indian version doesn't get a cup holder that is located behind the handbrake lever which is available in the car sold elsewhere in the world.
Difference in construction between Indian vs UK one
Damn you Maruti engineers! Why this step-motherly treatment to us when you sell and live life of a King because of we Indians?! What kind of money saving tactic is this?!
All the armrest's that are sold are directly bolted or seated into this very cup holder behind so installation is just minutes and D.I.Y. Now for me the cup holder itself was missing so I had to think of some alternative where I can compensate for the missing cup holder.
With all hopes of getting the armrest installed in my car, I let go the thought and continued driving as it is.
BUT, God had other plans.....


![[:)]](https://www.theautomotiveindia.com/forums/images/smilies/Smile.gif "Smile [:)]")
![[clap]](https://www.theautomotiveindia.com/forums/images/smilies/Clap.gif "Clap [clap]")
![[cry]](https://www.theautomotiveindia.com/forums/images/smilies/Cry.gif "Cry [cry]") in a swift
in a swift